How to connect BenefitFlow to your CRM and sync your first list
How to Connect BenefitFlow to Your CRM (Salesforce, HubSpot, or Dynamics)
BenefitFlow offers seamless, native integrations with Salesforce, HubSpot, and Microsoft Dynamics, enabling you to push detailed records (Employers, Contacts, Brokers, and Broker Office Locations) directly into your CRM with minimal setup.
Before you start the setup process:Ensure you are both a BenefitFlow Admin and either a Salesforce, Dynamics, or HubSpot Admin with read/write access to relevant CRM fields.
Integration Setup Steps
- Accessing Integration Settings
- Log in to your BenefitFlow account.
- In the upper-right corner, click your name and select Integrations.
- On the Integrations page, choose Salesforce, HubSpot, or Microsoft Dynamics to begin connection.
- Connecting to Salesforce
- Use 1-click authentication for quick setup (recommended for most customers), or
- Use Manual Credentials Entry for advanced/custom setups (refer to the Manual Setup Guide for details).
- Sandbox support is available if you’d like to test before syncing to production.
- Connecting to HubSpot
- Use our 1-click authentication to connect instantly.
- Sandbox environments are also supported for safe testing.
- Connecting to Microsoft Dynamics
- Requires creating an Azure App Registration and Power Platform Application User.
- Refer to the Dynamics Setup Guide for detailed instructions.
Mapping Fields Between BenefitFlow and Your CRM
Once connected, configure your integration by mapping key fields between platforms:
- Click Integration Settings
- Use Add Field Mapping to:
- Select a BenefitFlow field
- Choose a corresponding CRM field, or use a constant/custom value
- Define whether the field can overwrite existing values or update only if empty
- Click Save Changes to finalize
Mappings can be customized for:
- Employer vs. Broker data
- Accounts vs. Child Accounts vs. Contacts
For the full list of BenefitFlow fields available in each object, see the Field Mapping Reference.
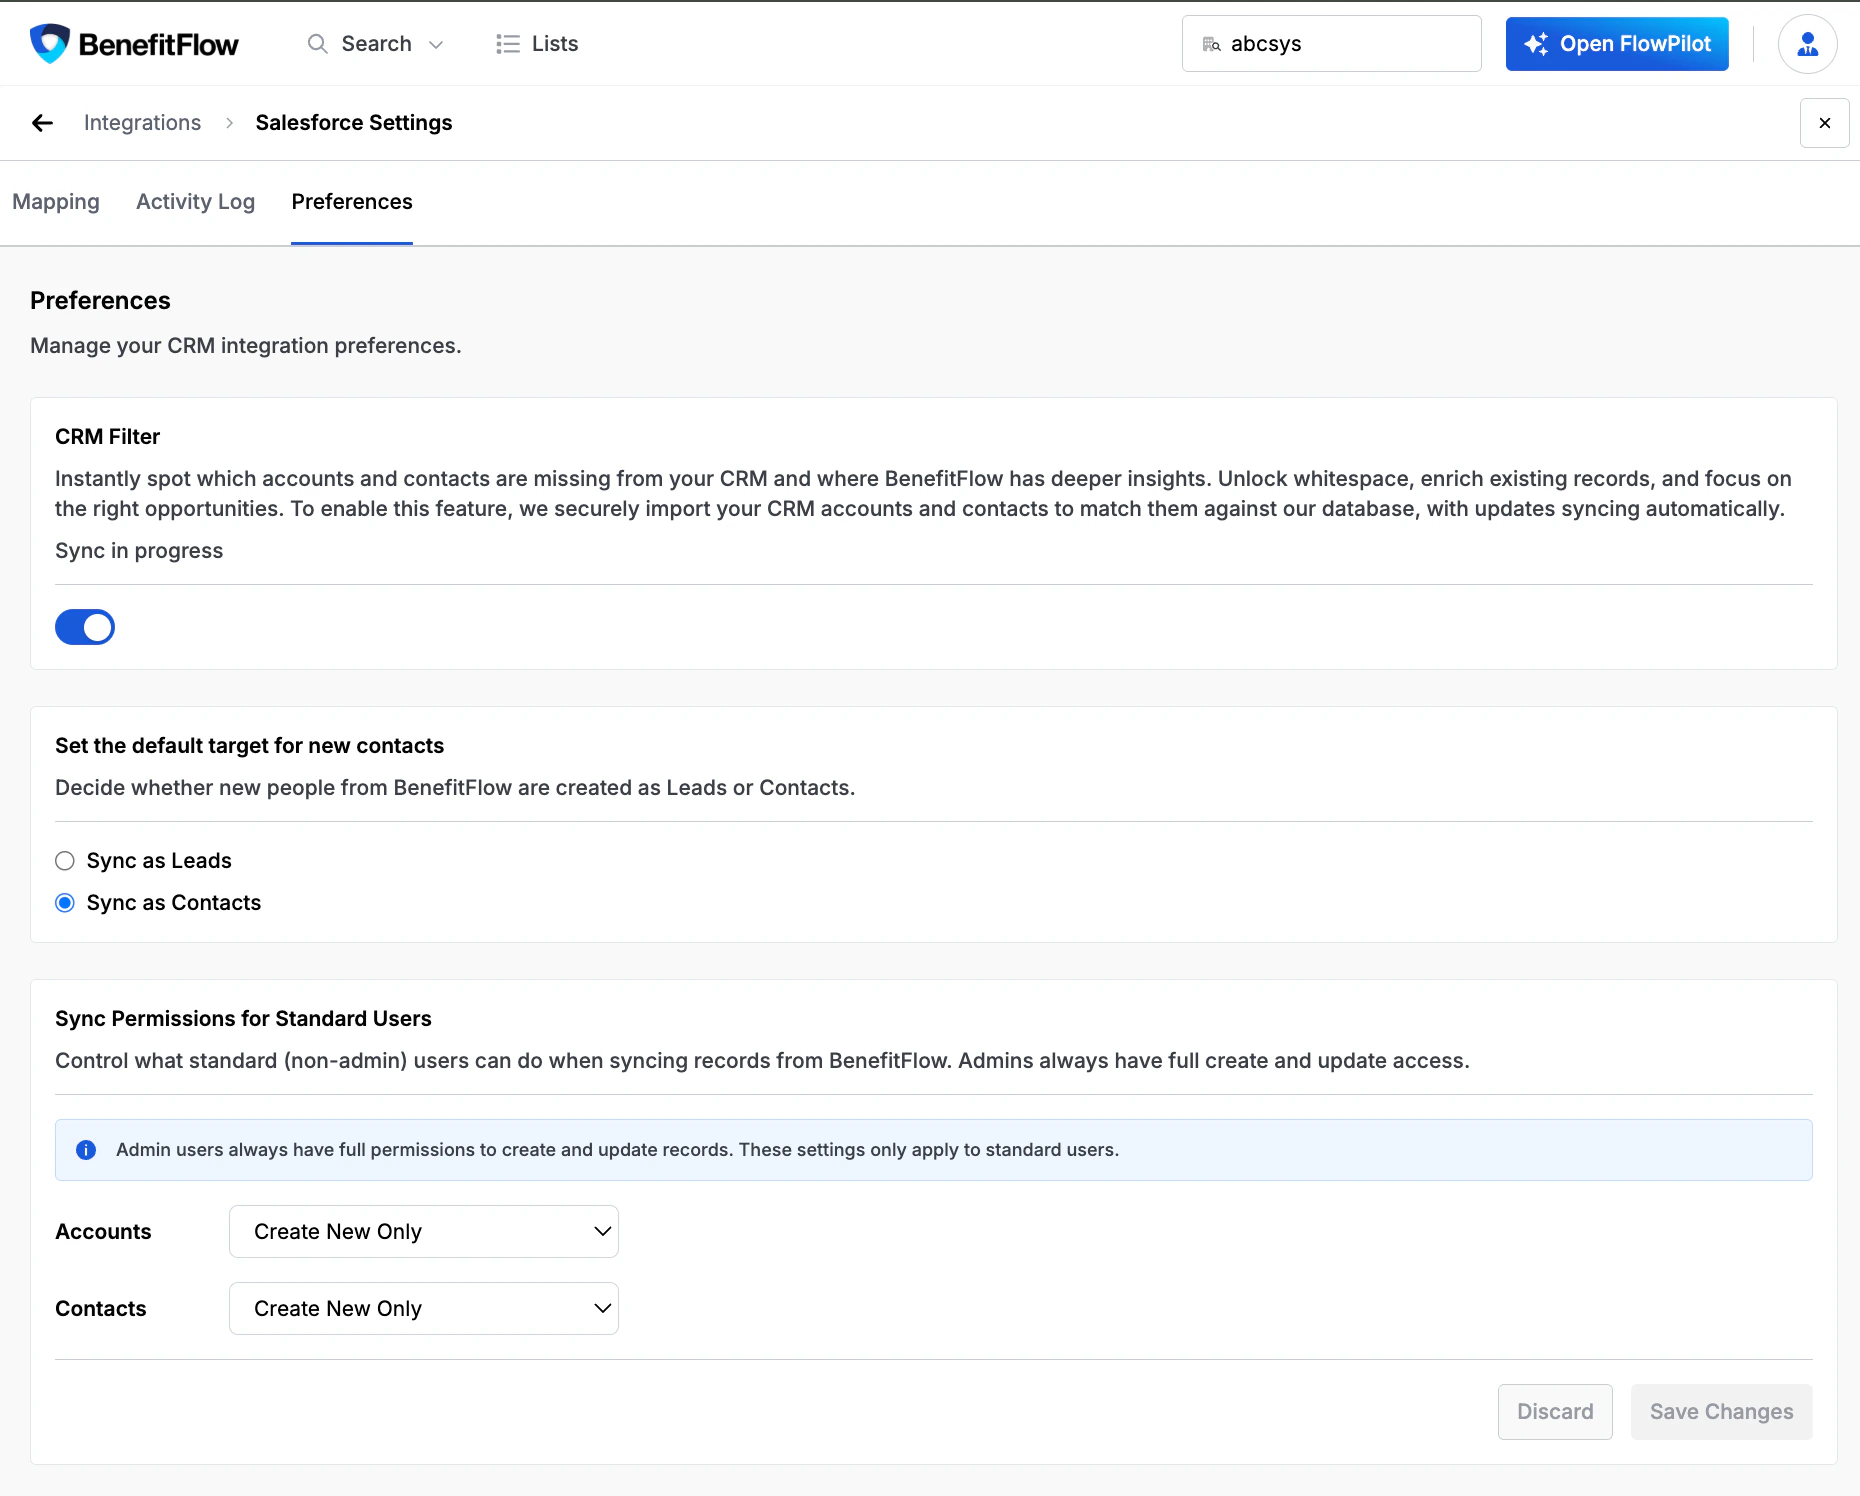
Configuring Sync Permissions (Optional)
After setting up your field mappings, you can optionally configure what sync operations standard users are allowed to perform:
- Click Integration Settings, then select the Preferences tab
- Under Sync Permissions for Standard Users, choose a permission level for Accounts and Contacts:
- Create new and update existing
- Create new only (default)
- Update existing only
By default, standard users can only create net-new records — this matches BenefitFlow’s previous behavior. Admin users always have full sync access regardless of this setting.
Syncing Data to Your CRM
- Navigate to the Lists tab
- Choose a list (e.g., Brokers, Broker Contacts, Employers, Employer Contacts)
- Click Sync on the list to initiate
Smart Sync Logic:
- ✅ Net-New: If the record doesn’t exist in your CRM, BenefitFlow adds it
- 🔁 Update: If the record exists, only approved mapped fields are updated
- ✔️ Synced: If no changes are needed, the record is marked as synced
Additional Tools:
- Use Assign Owner to manually reassign CRM record ownership
- Push records one-by-one or bulk sync your entire list using “Sync to CRM”
Post-Sync Actions
Once synced, you can:
- Click into a record from BenefitFlow to view it directly in your CRM
- Verify updates went through as expected
- Continue refining field mappings as your CRM evolves
Need Help?
Contact customerteam@benefit-flow.com for hands-on support.