Most customers should use 1-click authentication from the Integrations page. The instructions below are for manual or advanced setups only.
Est. Setup Time: 10 minutes
1
Login to Salesforce and click the “Setup” button in the top right of your screen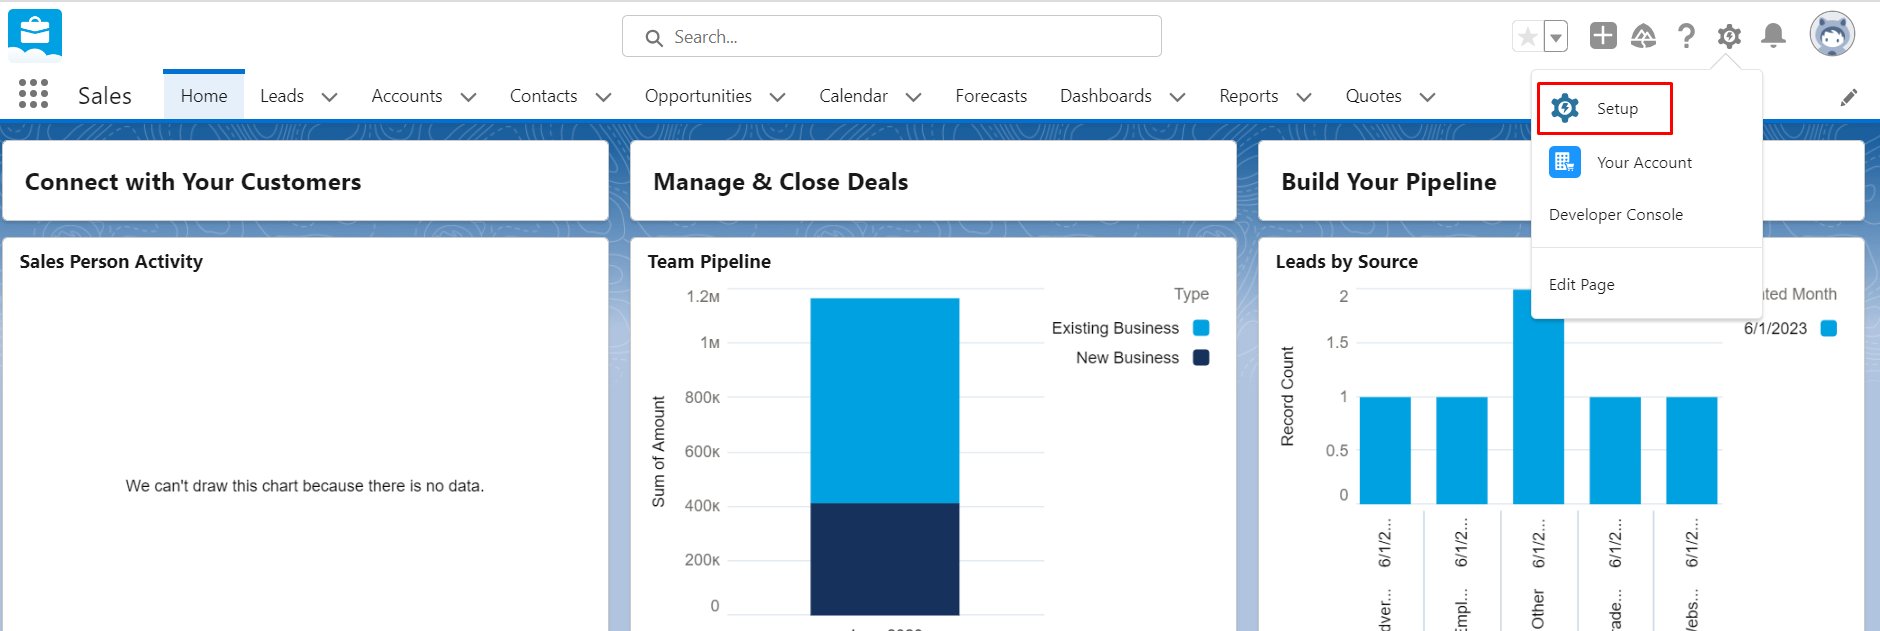
2
Search for “App Manager” on the left side of the screen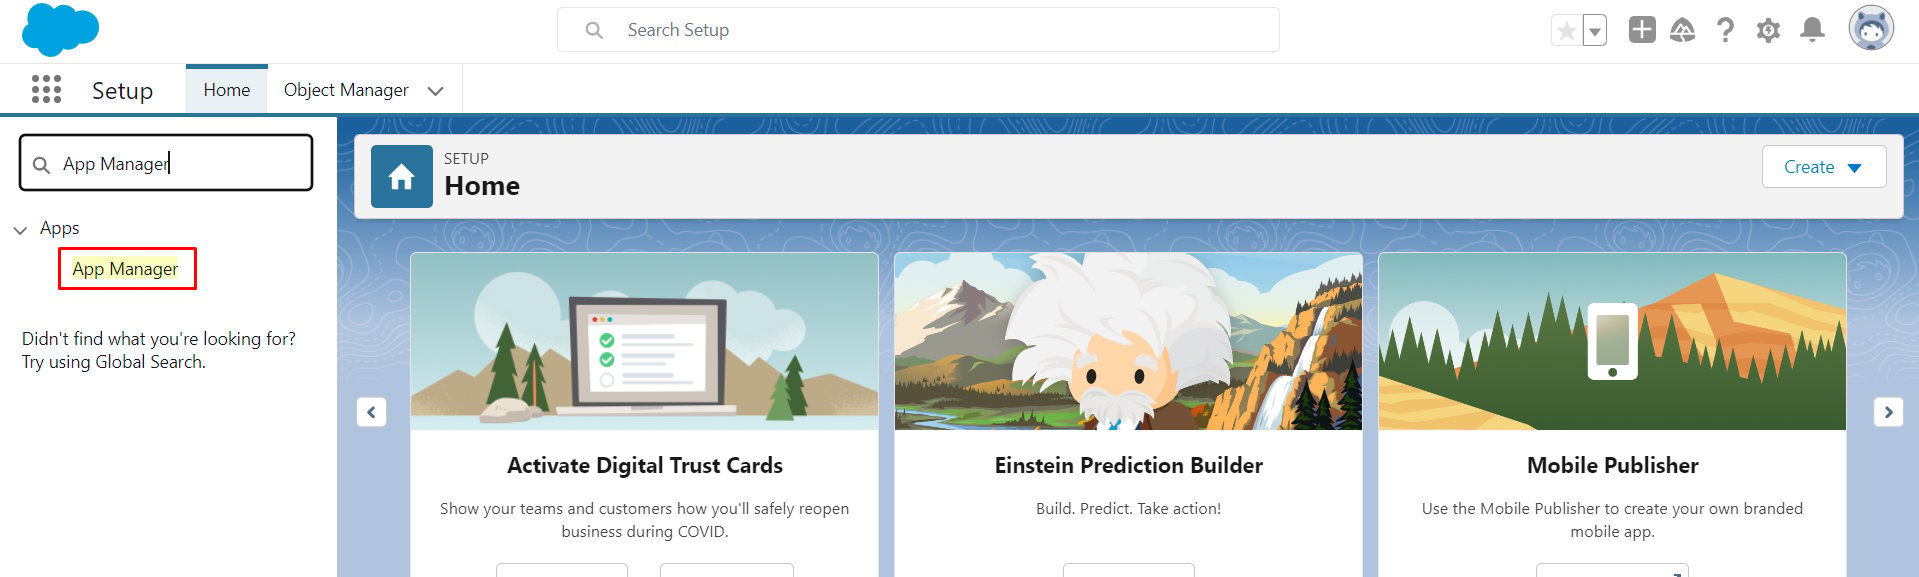
3
Create a new connected app by clicking the “New Connected App” button on the top right of the screen
4
Enter in the values exactly as they are below and click save at the bottom of the screen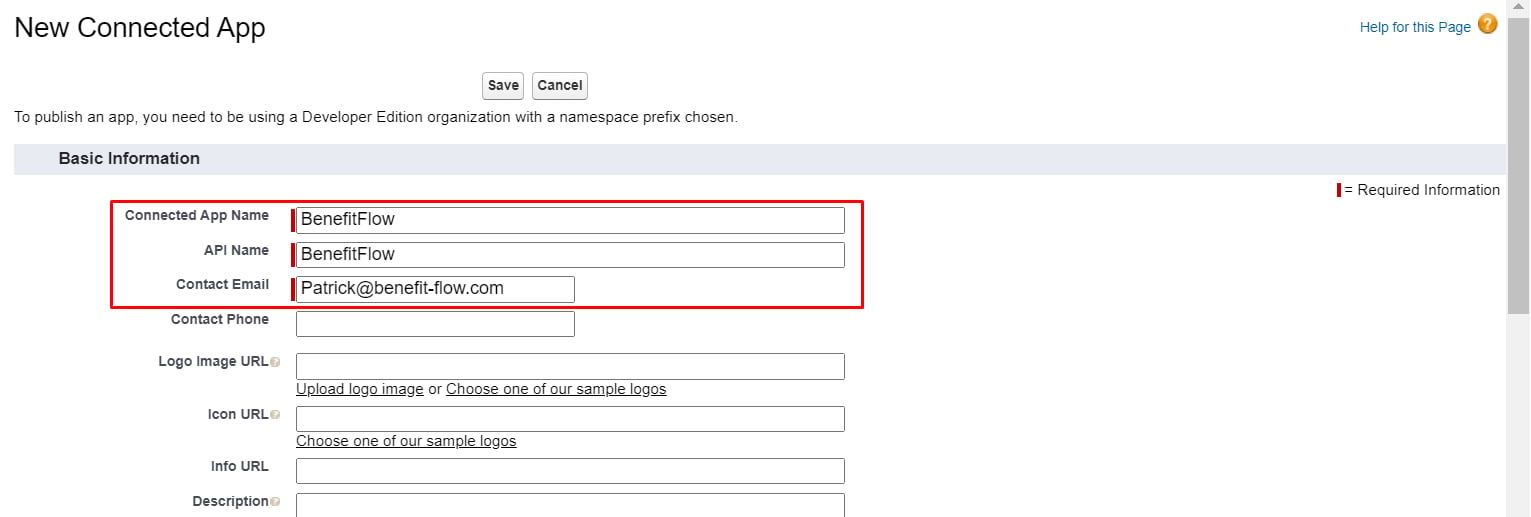
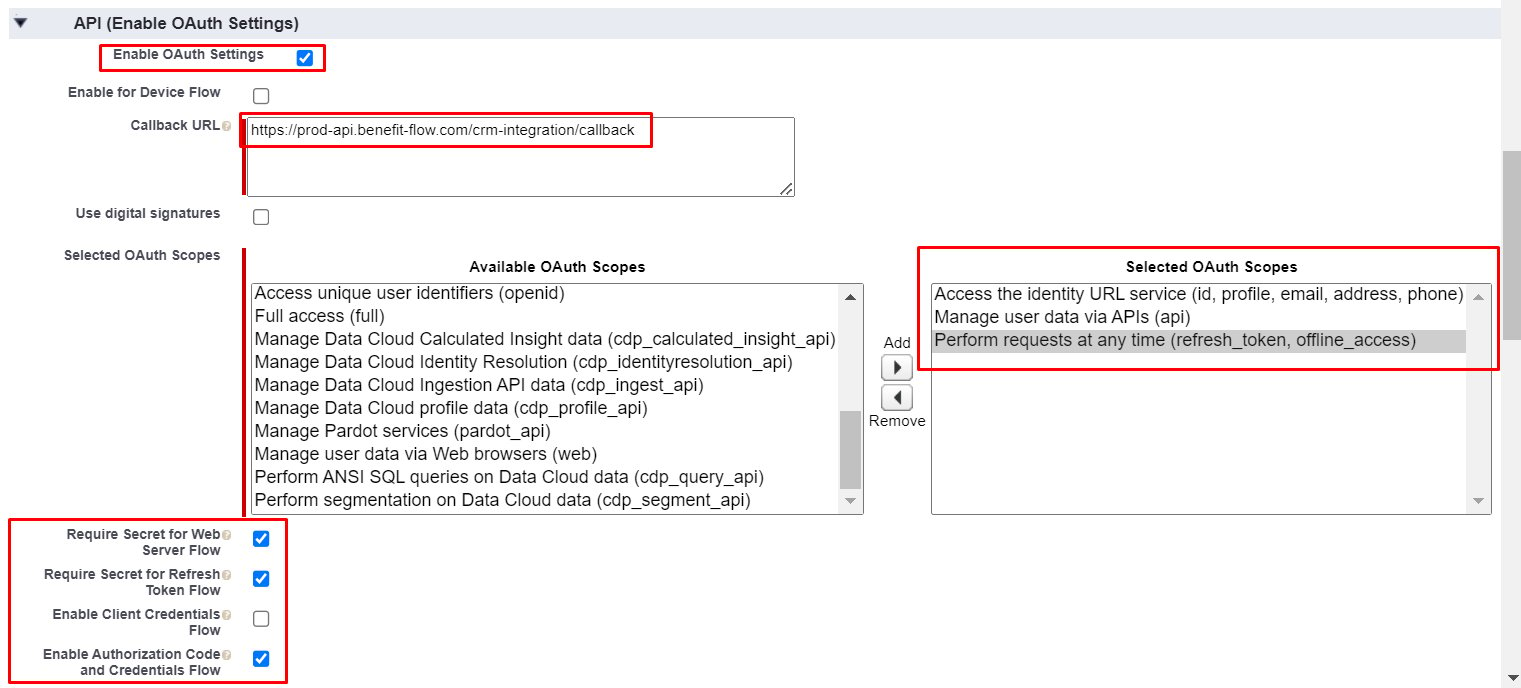
Note: ** Ensure that PKCE is Disabled**
5
Scroll to the bottom and click “Save”
Note: It may take ~10 minutes for the new App to save in Salesforce.
6
Get the login credentials by clicking the “Manage Consumer Details” button below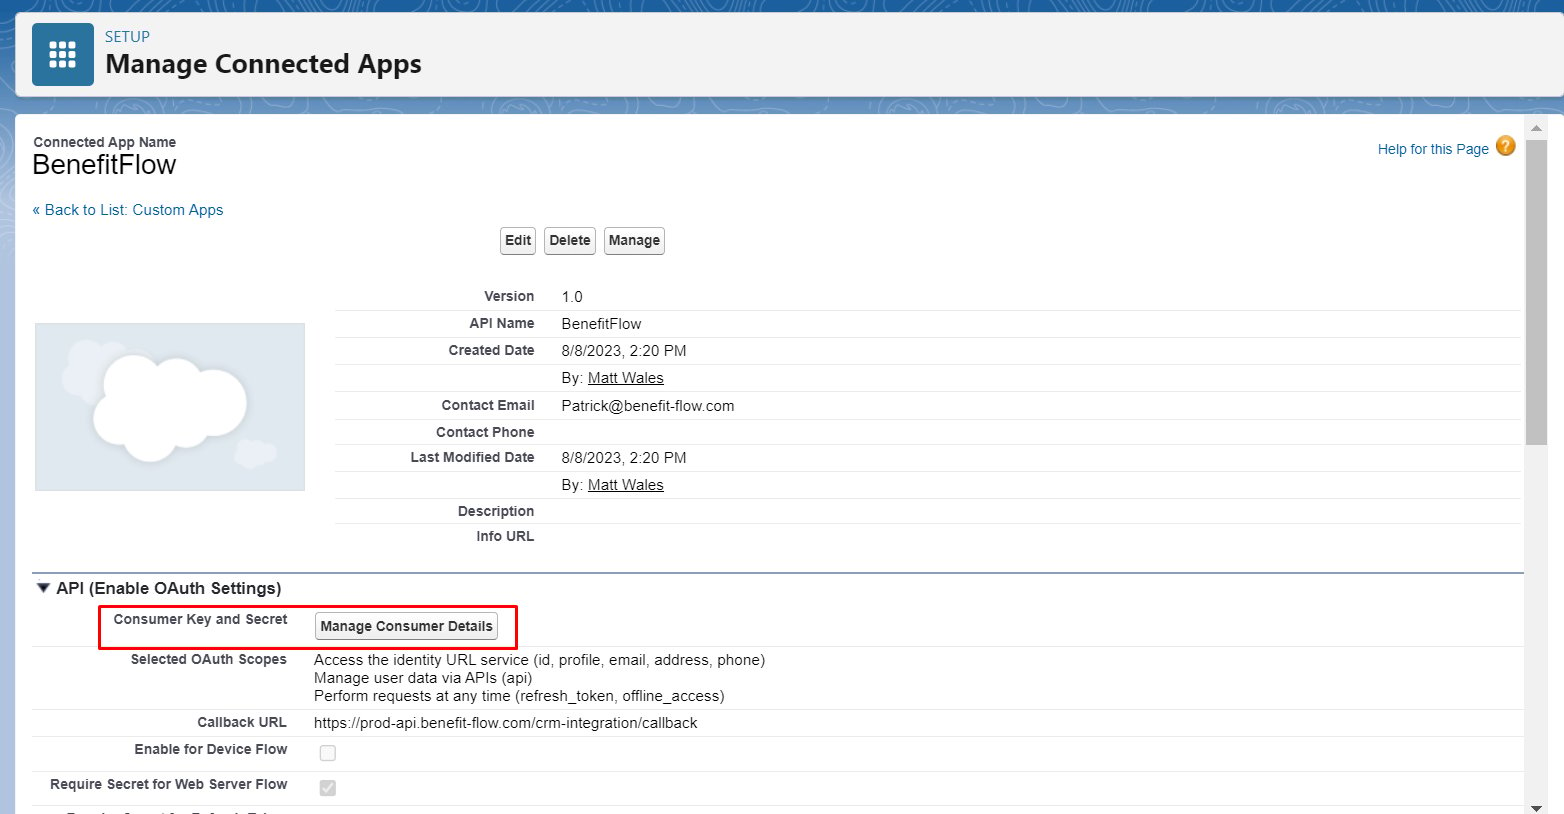
7
Copy the consumer key and secret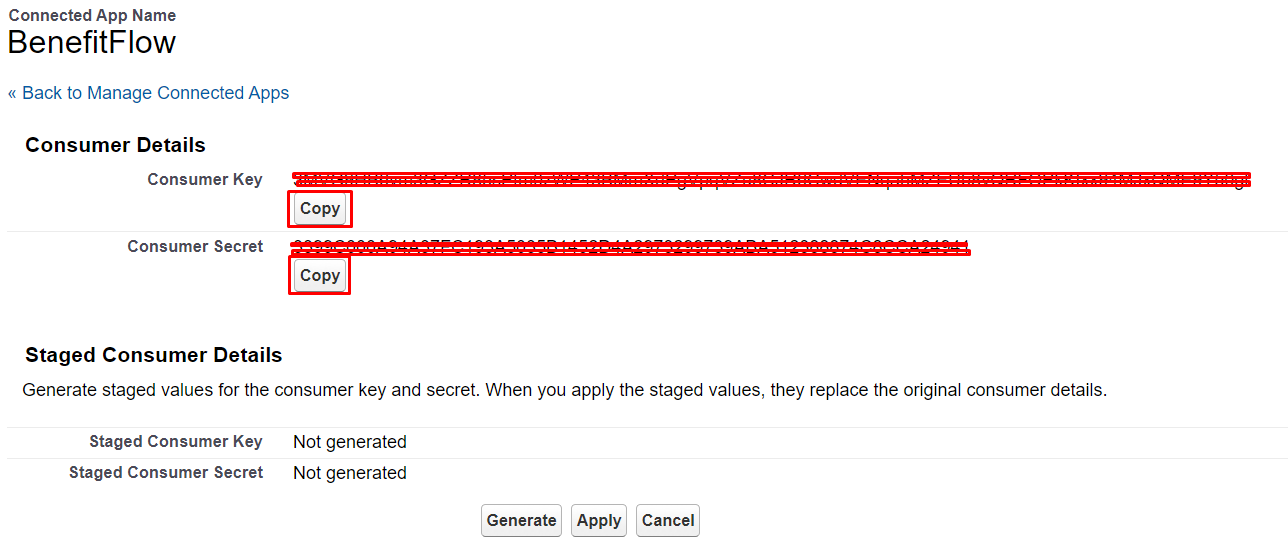
8
Navigate to the “Integrations” page in BenefitFlow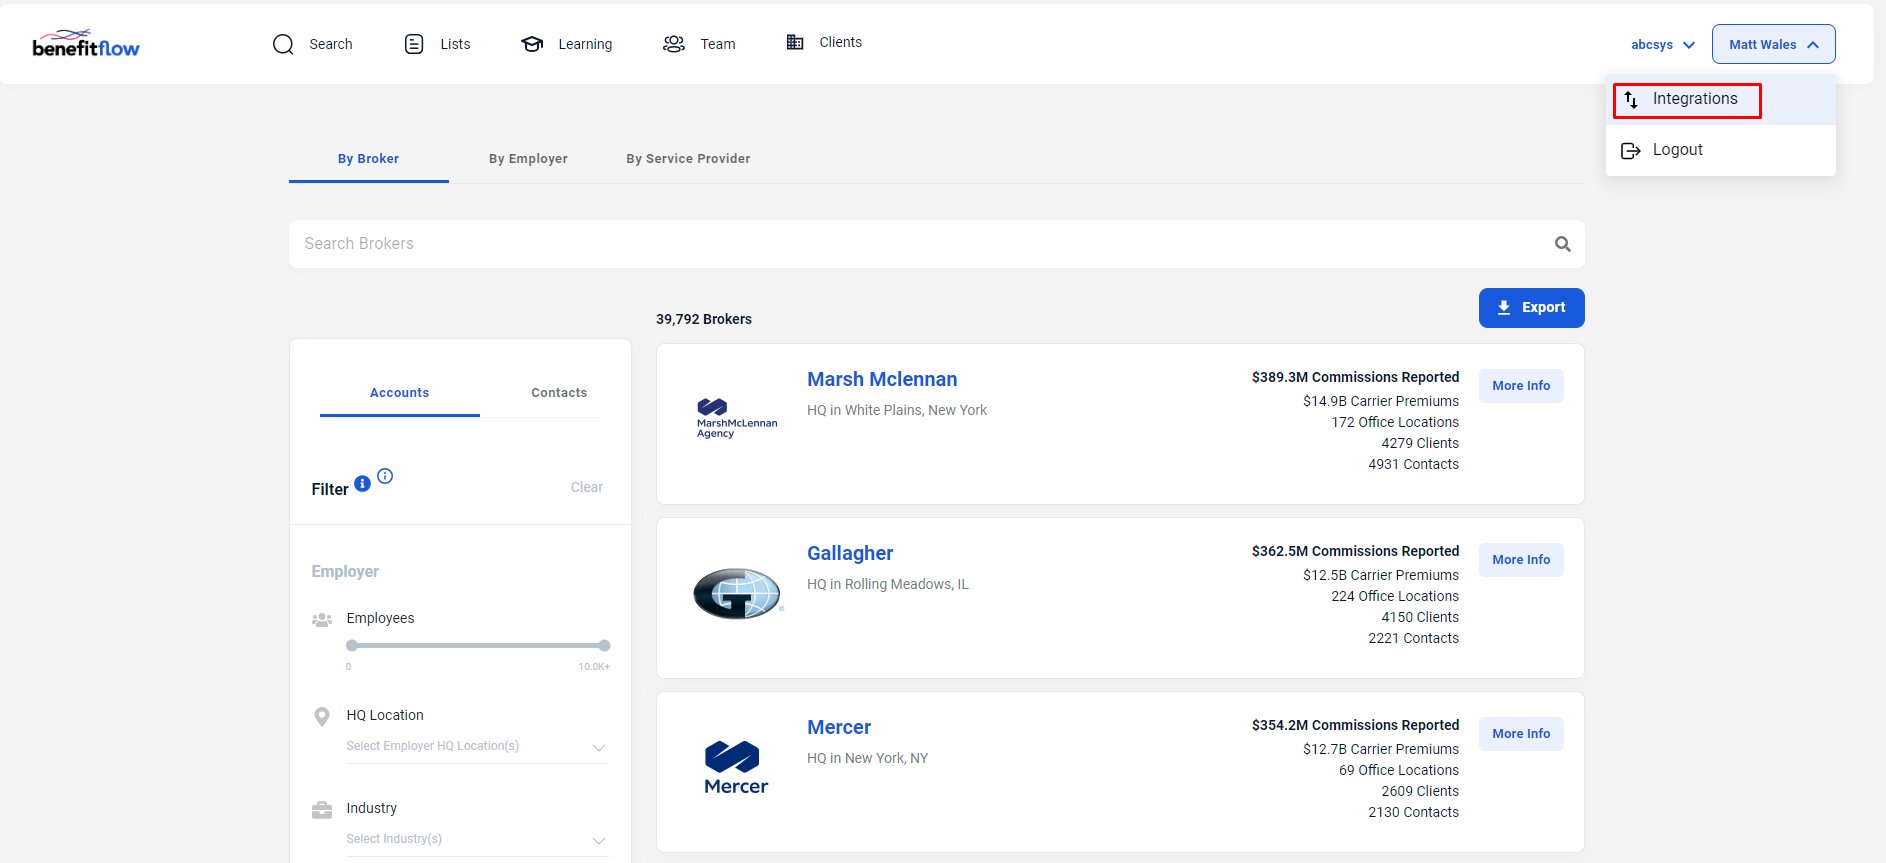
9
Click the “Connect” button to connect to Salesforce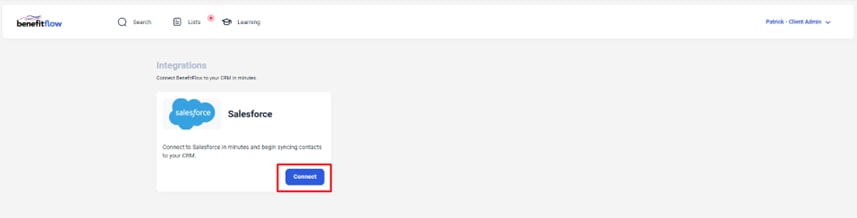
10
Enter in the “Consumer Key” and “Consumer Secret” from Salesforce then click “Save”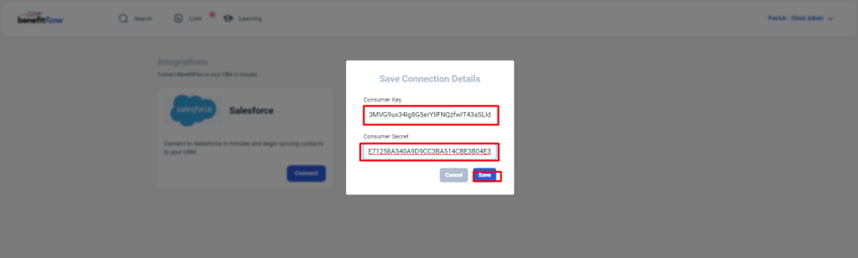
11
Success!