

Before you begin
We’ll have sent you two values to paste into Entra in Step 3:
Neither value is secret, and nothing you send back to us is secret either. Single sign-on
metadata is made up of public endpoints and a public certificate, so email is a fine way to
exchange all of it.
Set up the application in Entra
1
Create the application
In the Entra admin center, go to Enterprise applications, then New application.Choose Create your own application, then select Integrate any other application you
don’t find in the gallery (Non-gallery). Name it BenefitFlow and click Create.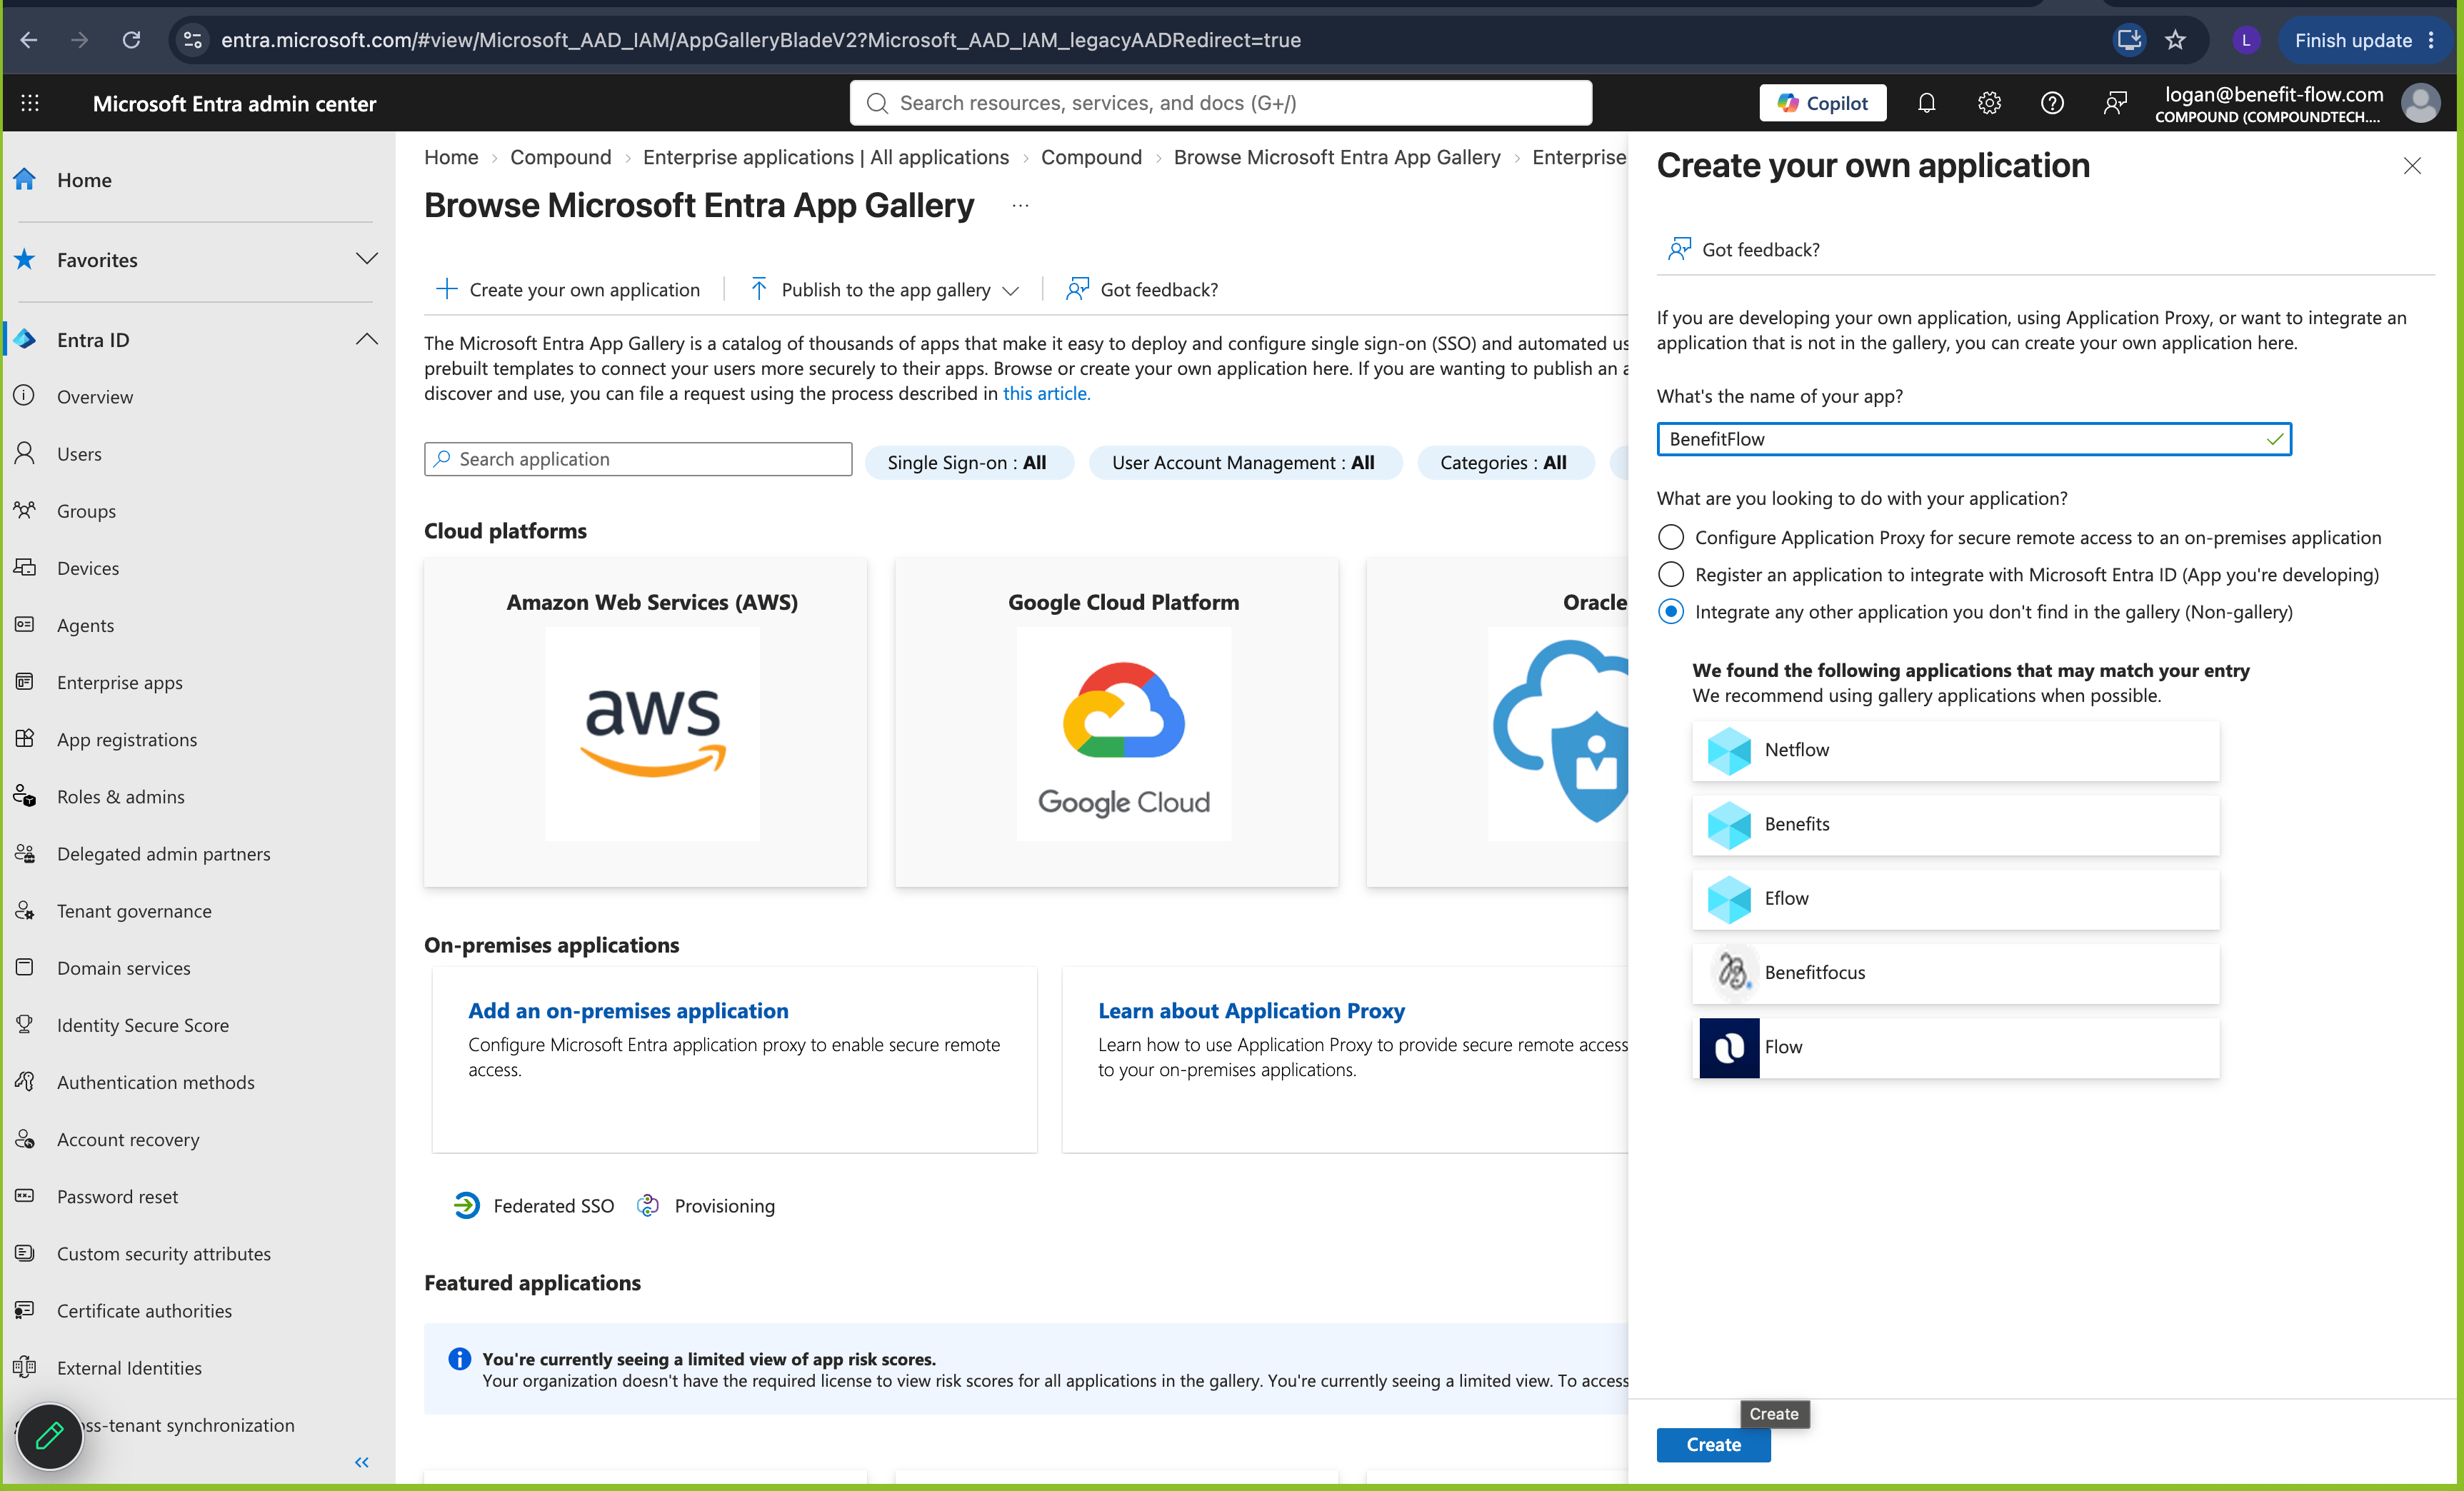
2
Start SAML setup
Open the new application, go to Single sign-on, and choose SAML as the method.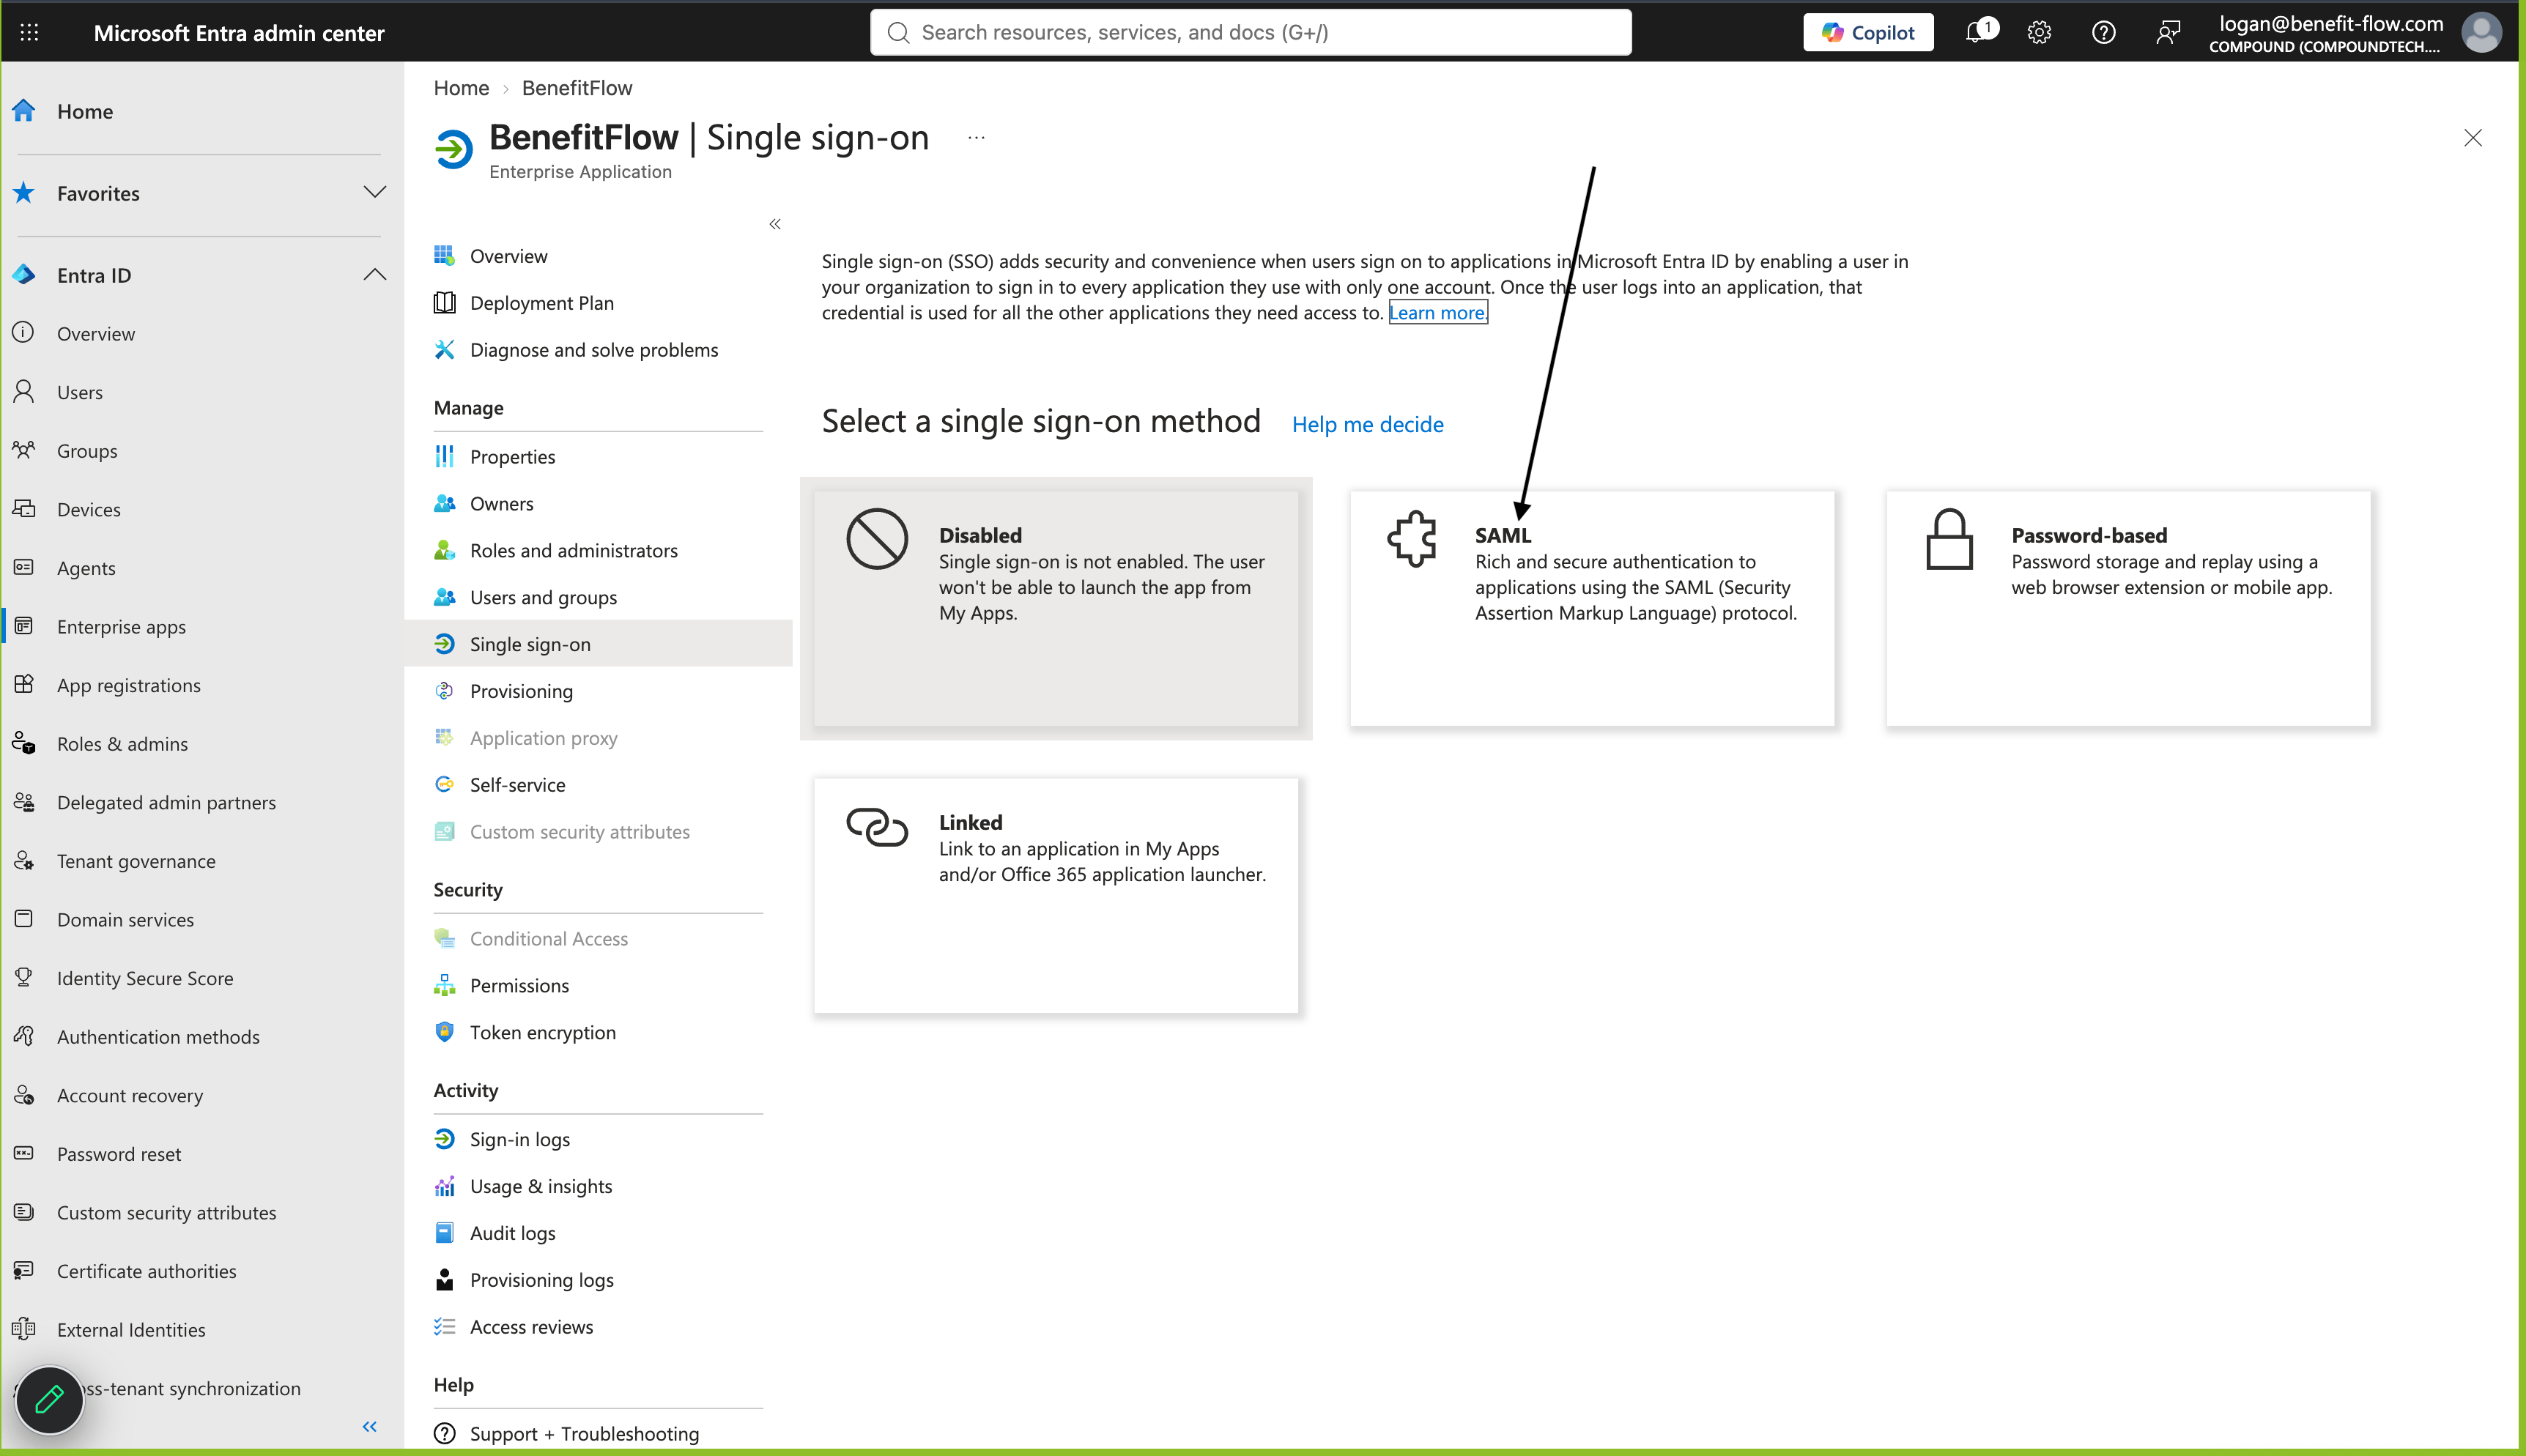
3
Enter the two connection values
In the Basic SAML Configuration panel, click Edit and fill in: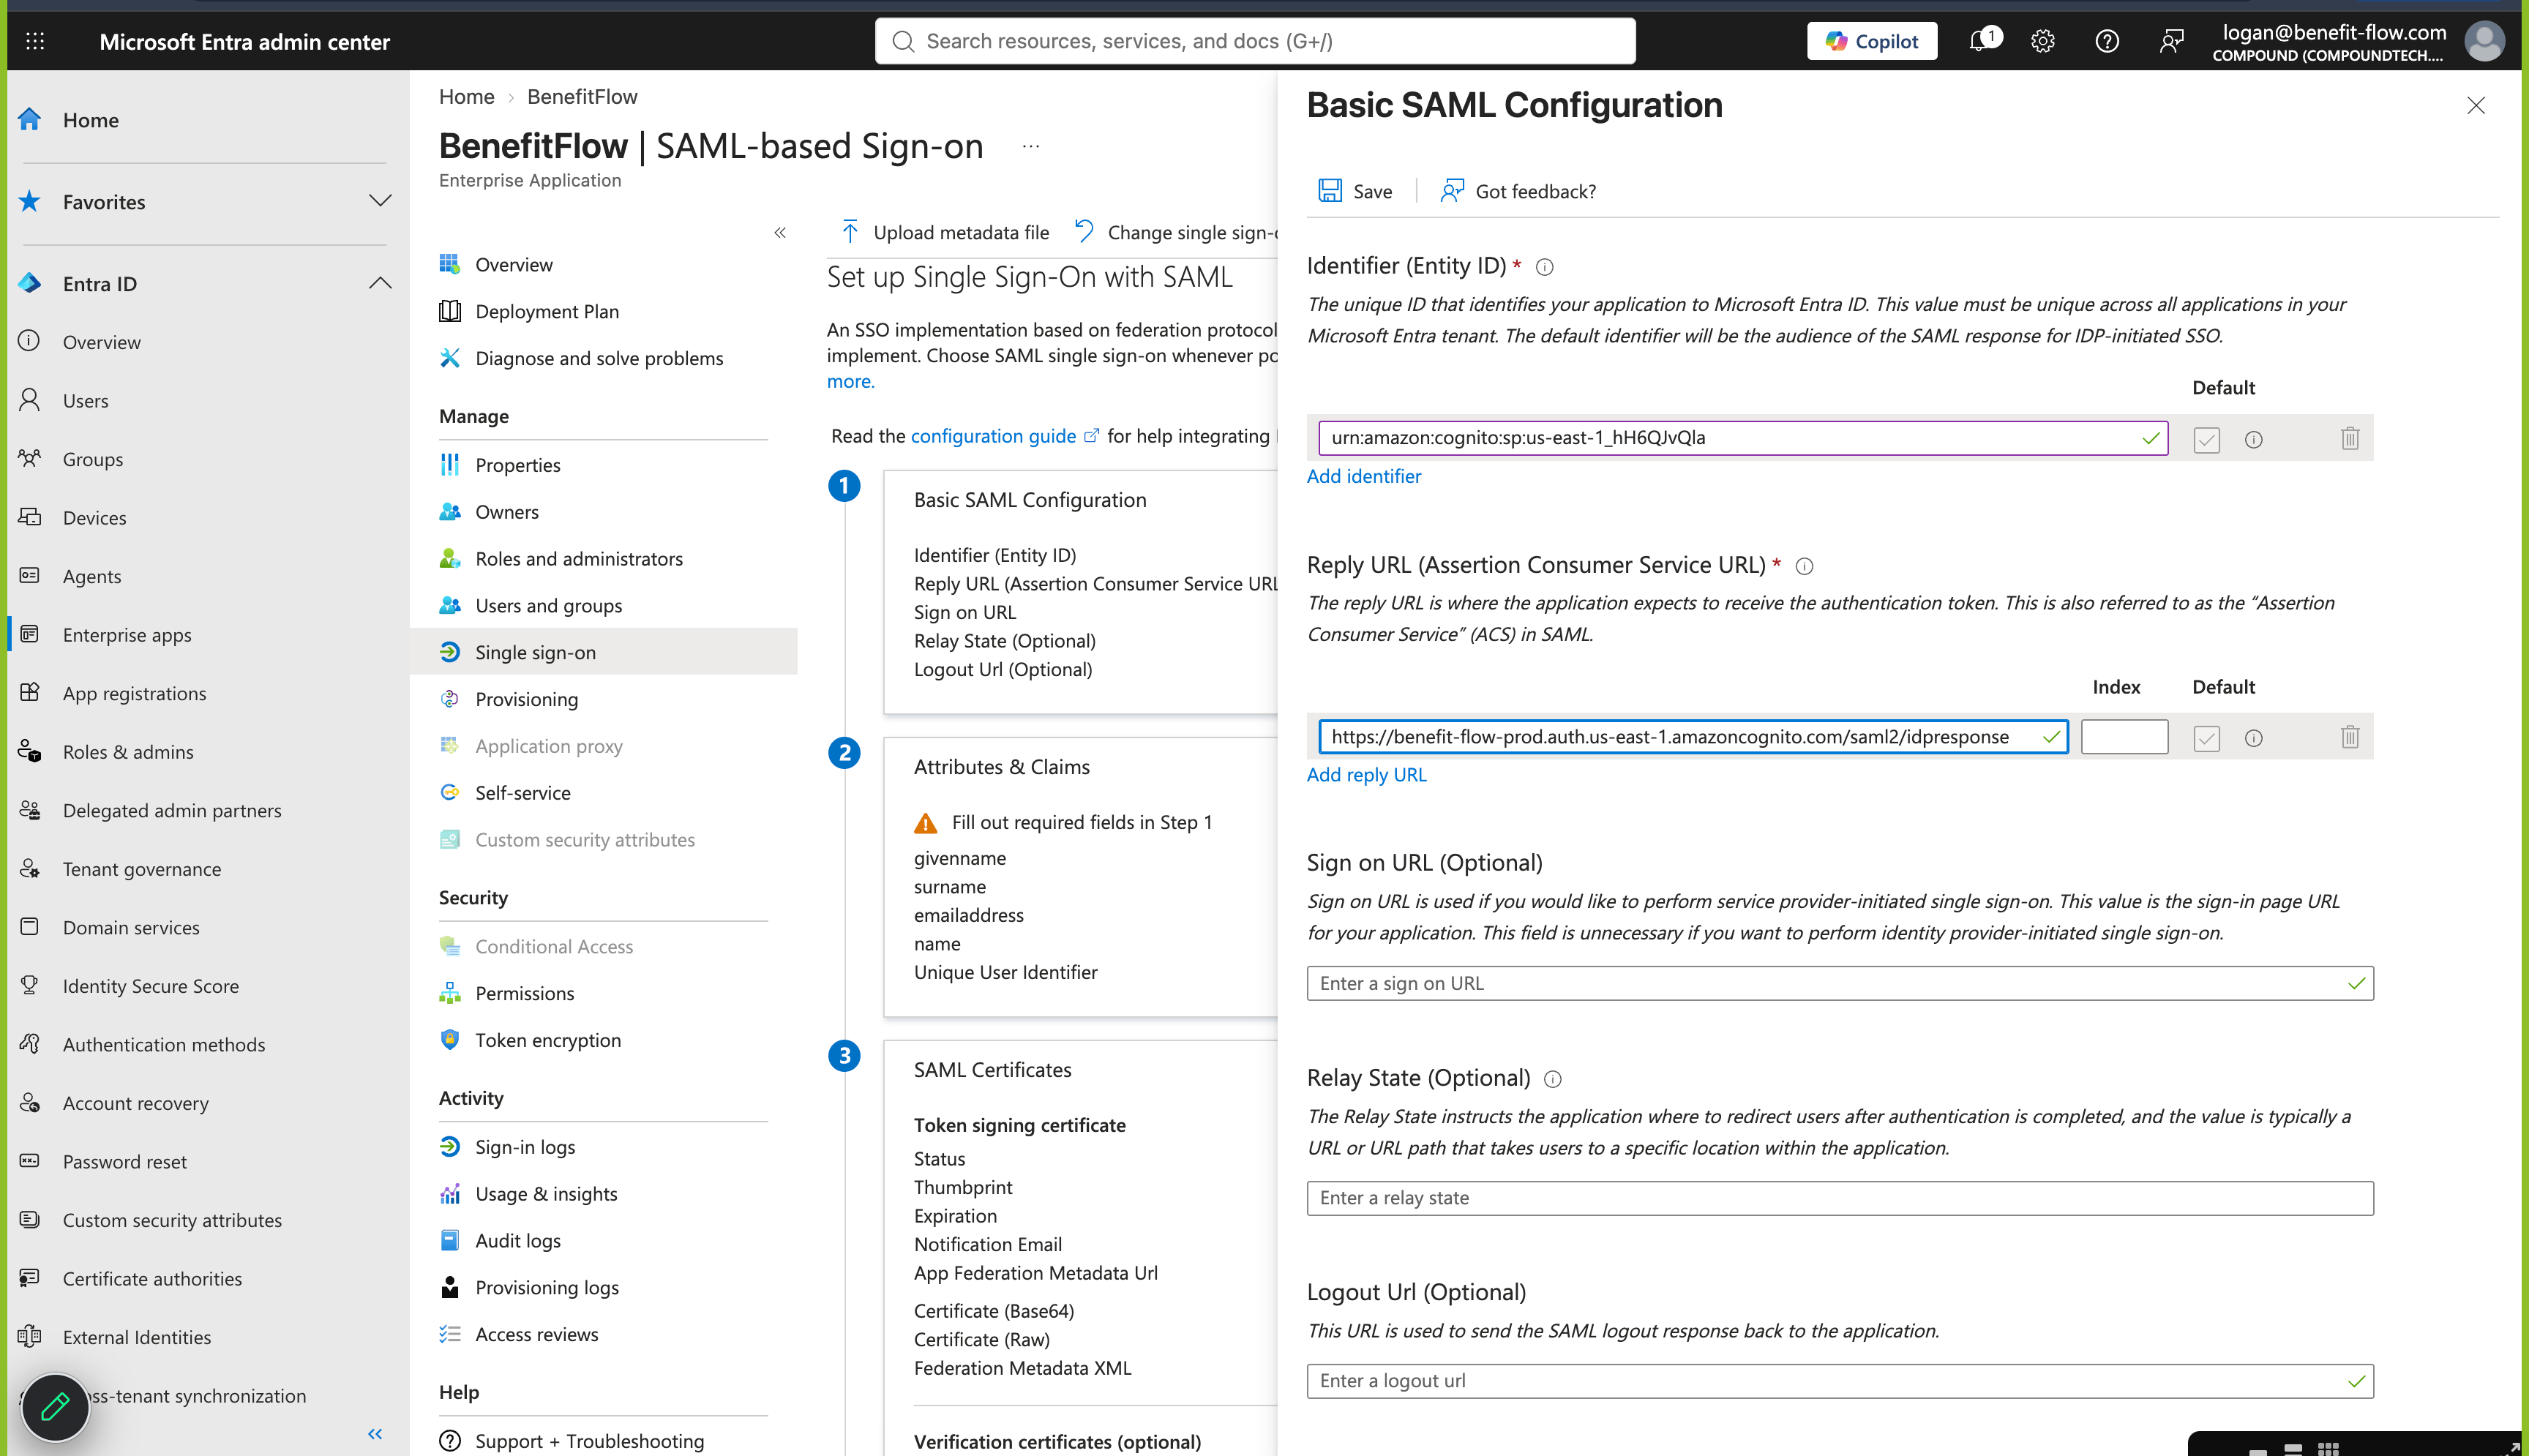
- Identifier (Entity ID):
urn:amazon:cognito:sp:us-east-1_hH6QJvQla - Reply URL (Assertion Consumer Service URL):
https://benefit-flow-prod.auth.us-east-1.amazoncognito.com/saml2/idpresponse
4
Add the email claim
This is the step that matters most. BenefitFlow matches each sign-in to an account by email
address, so Entra has to send us that address under a claim named exactly 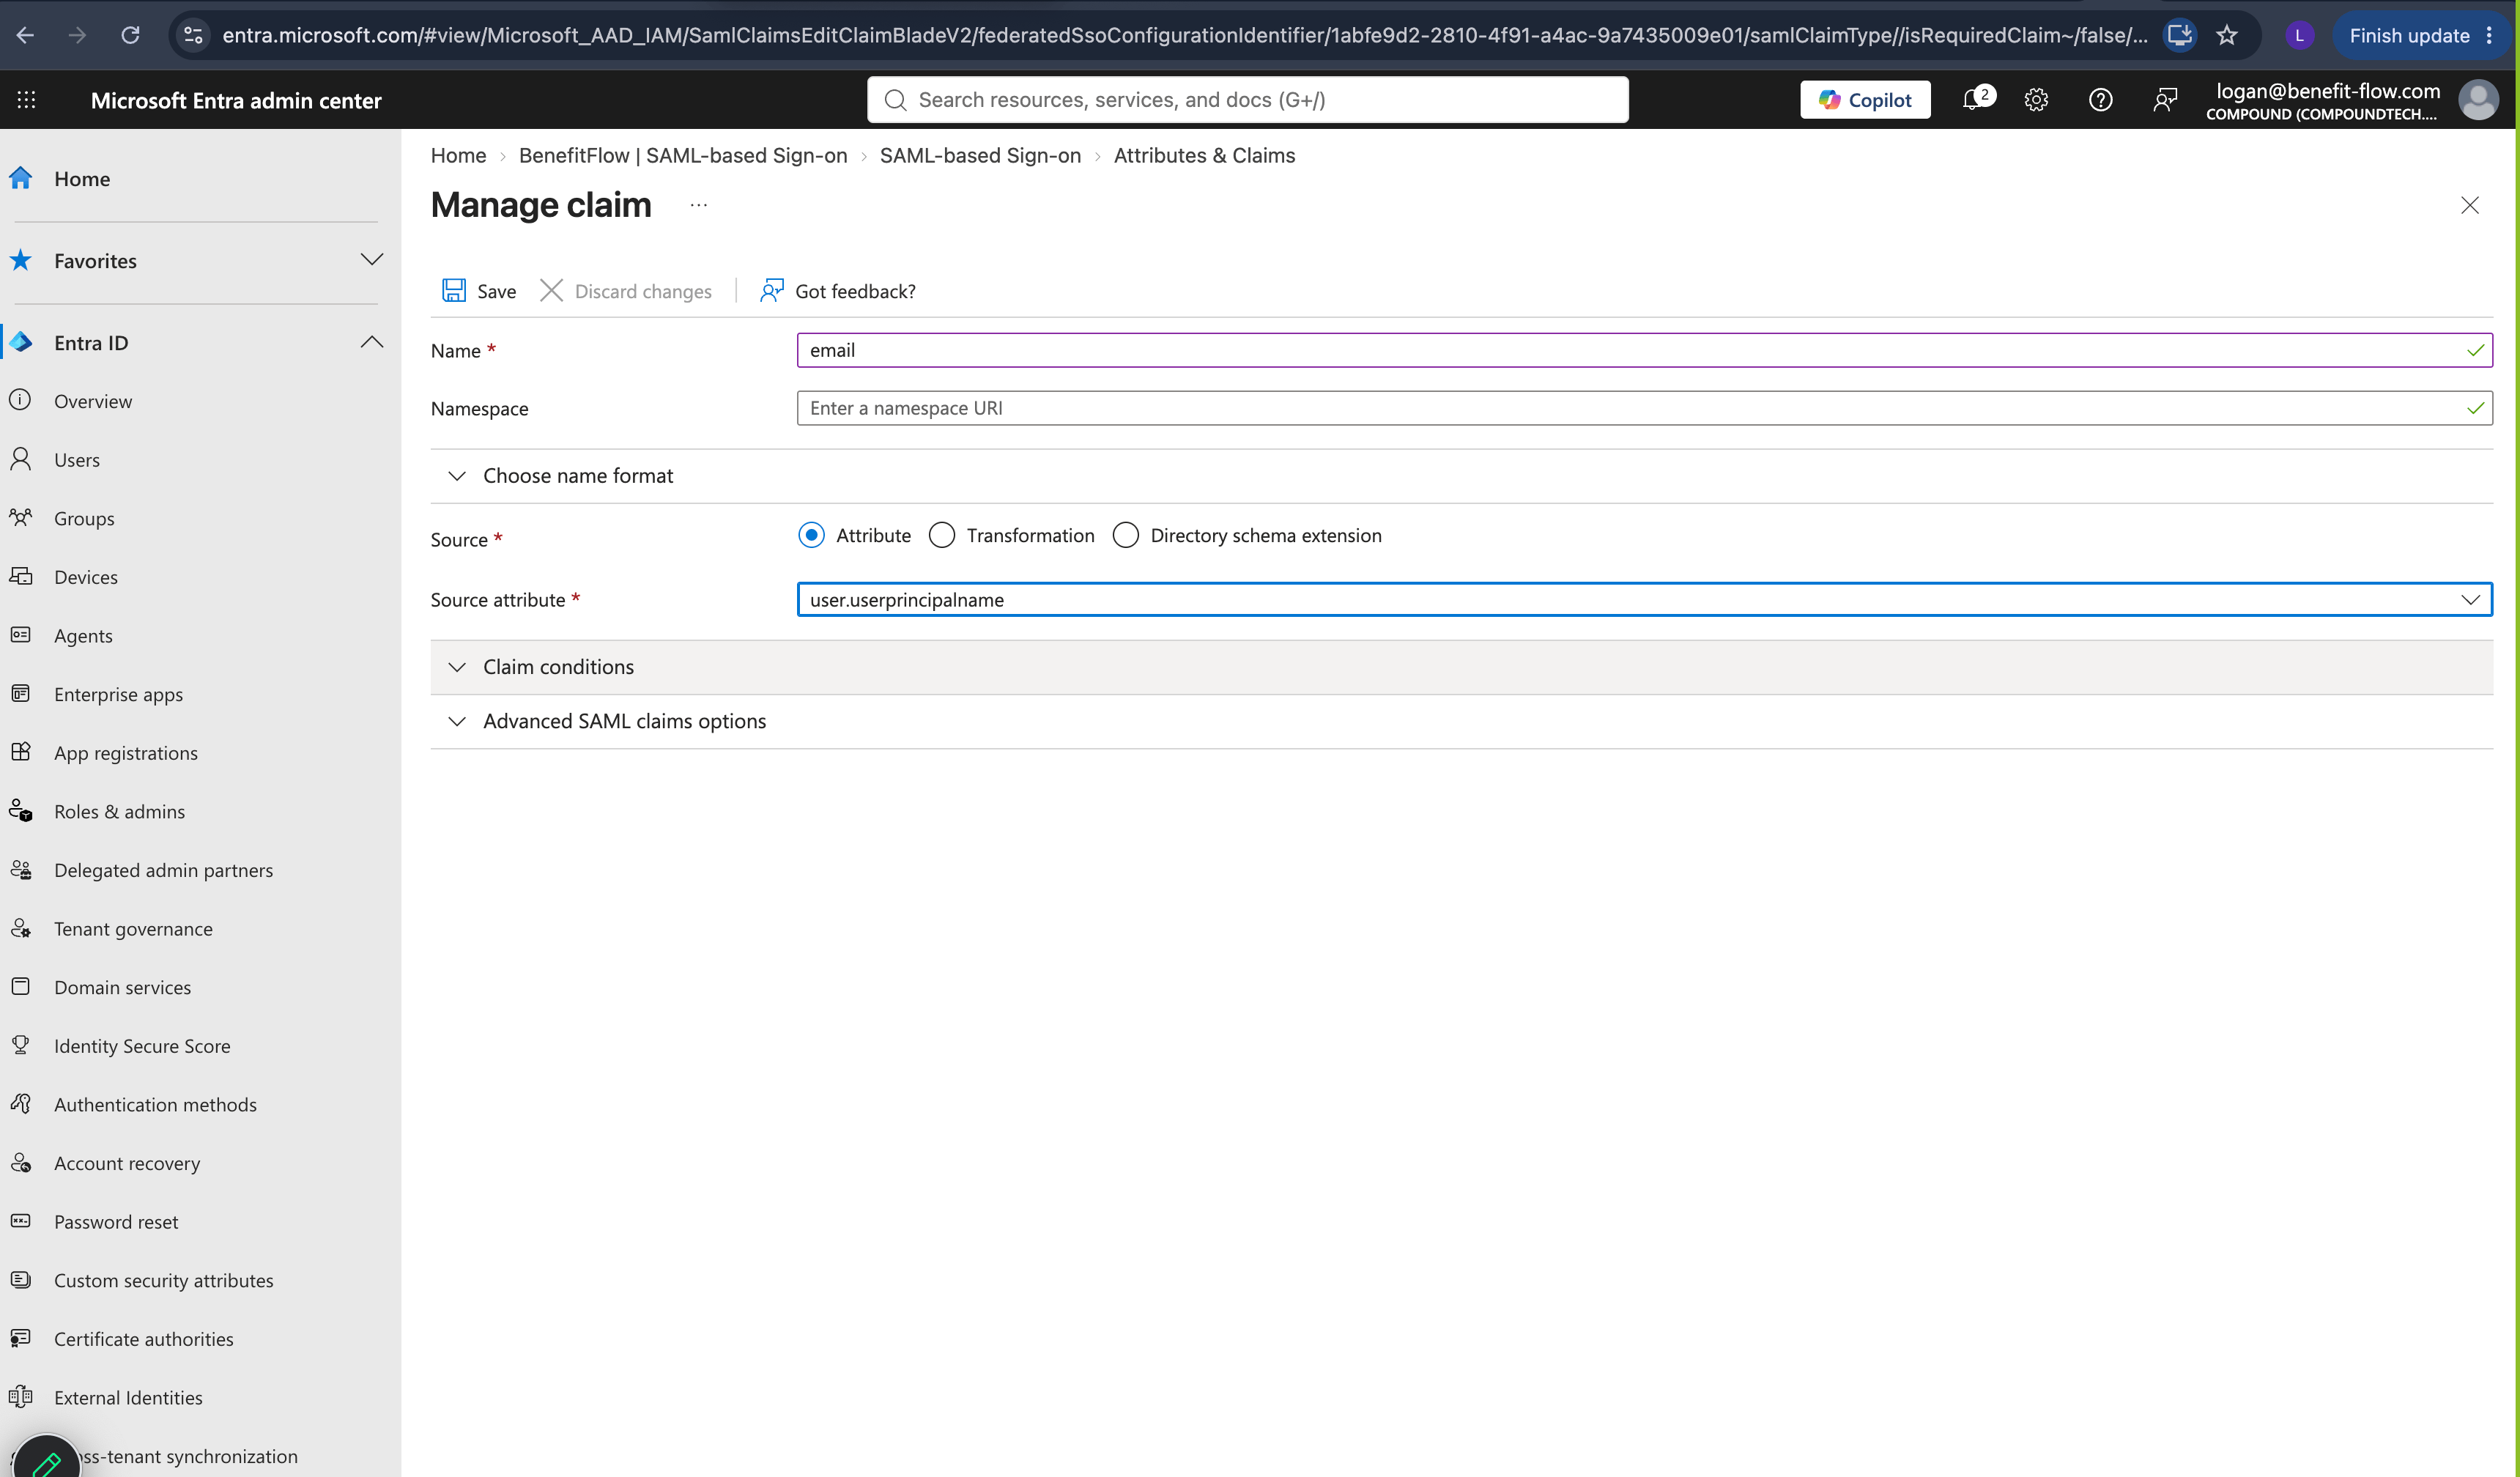
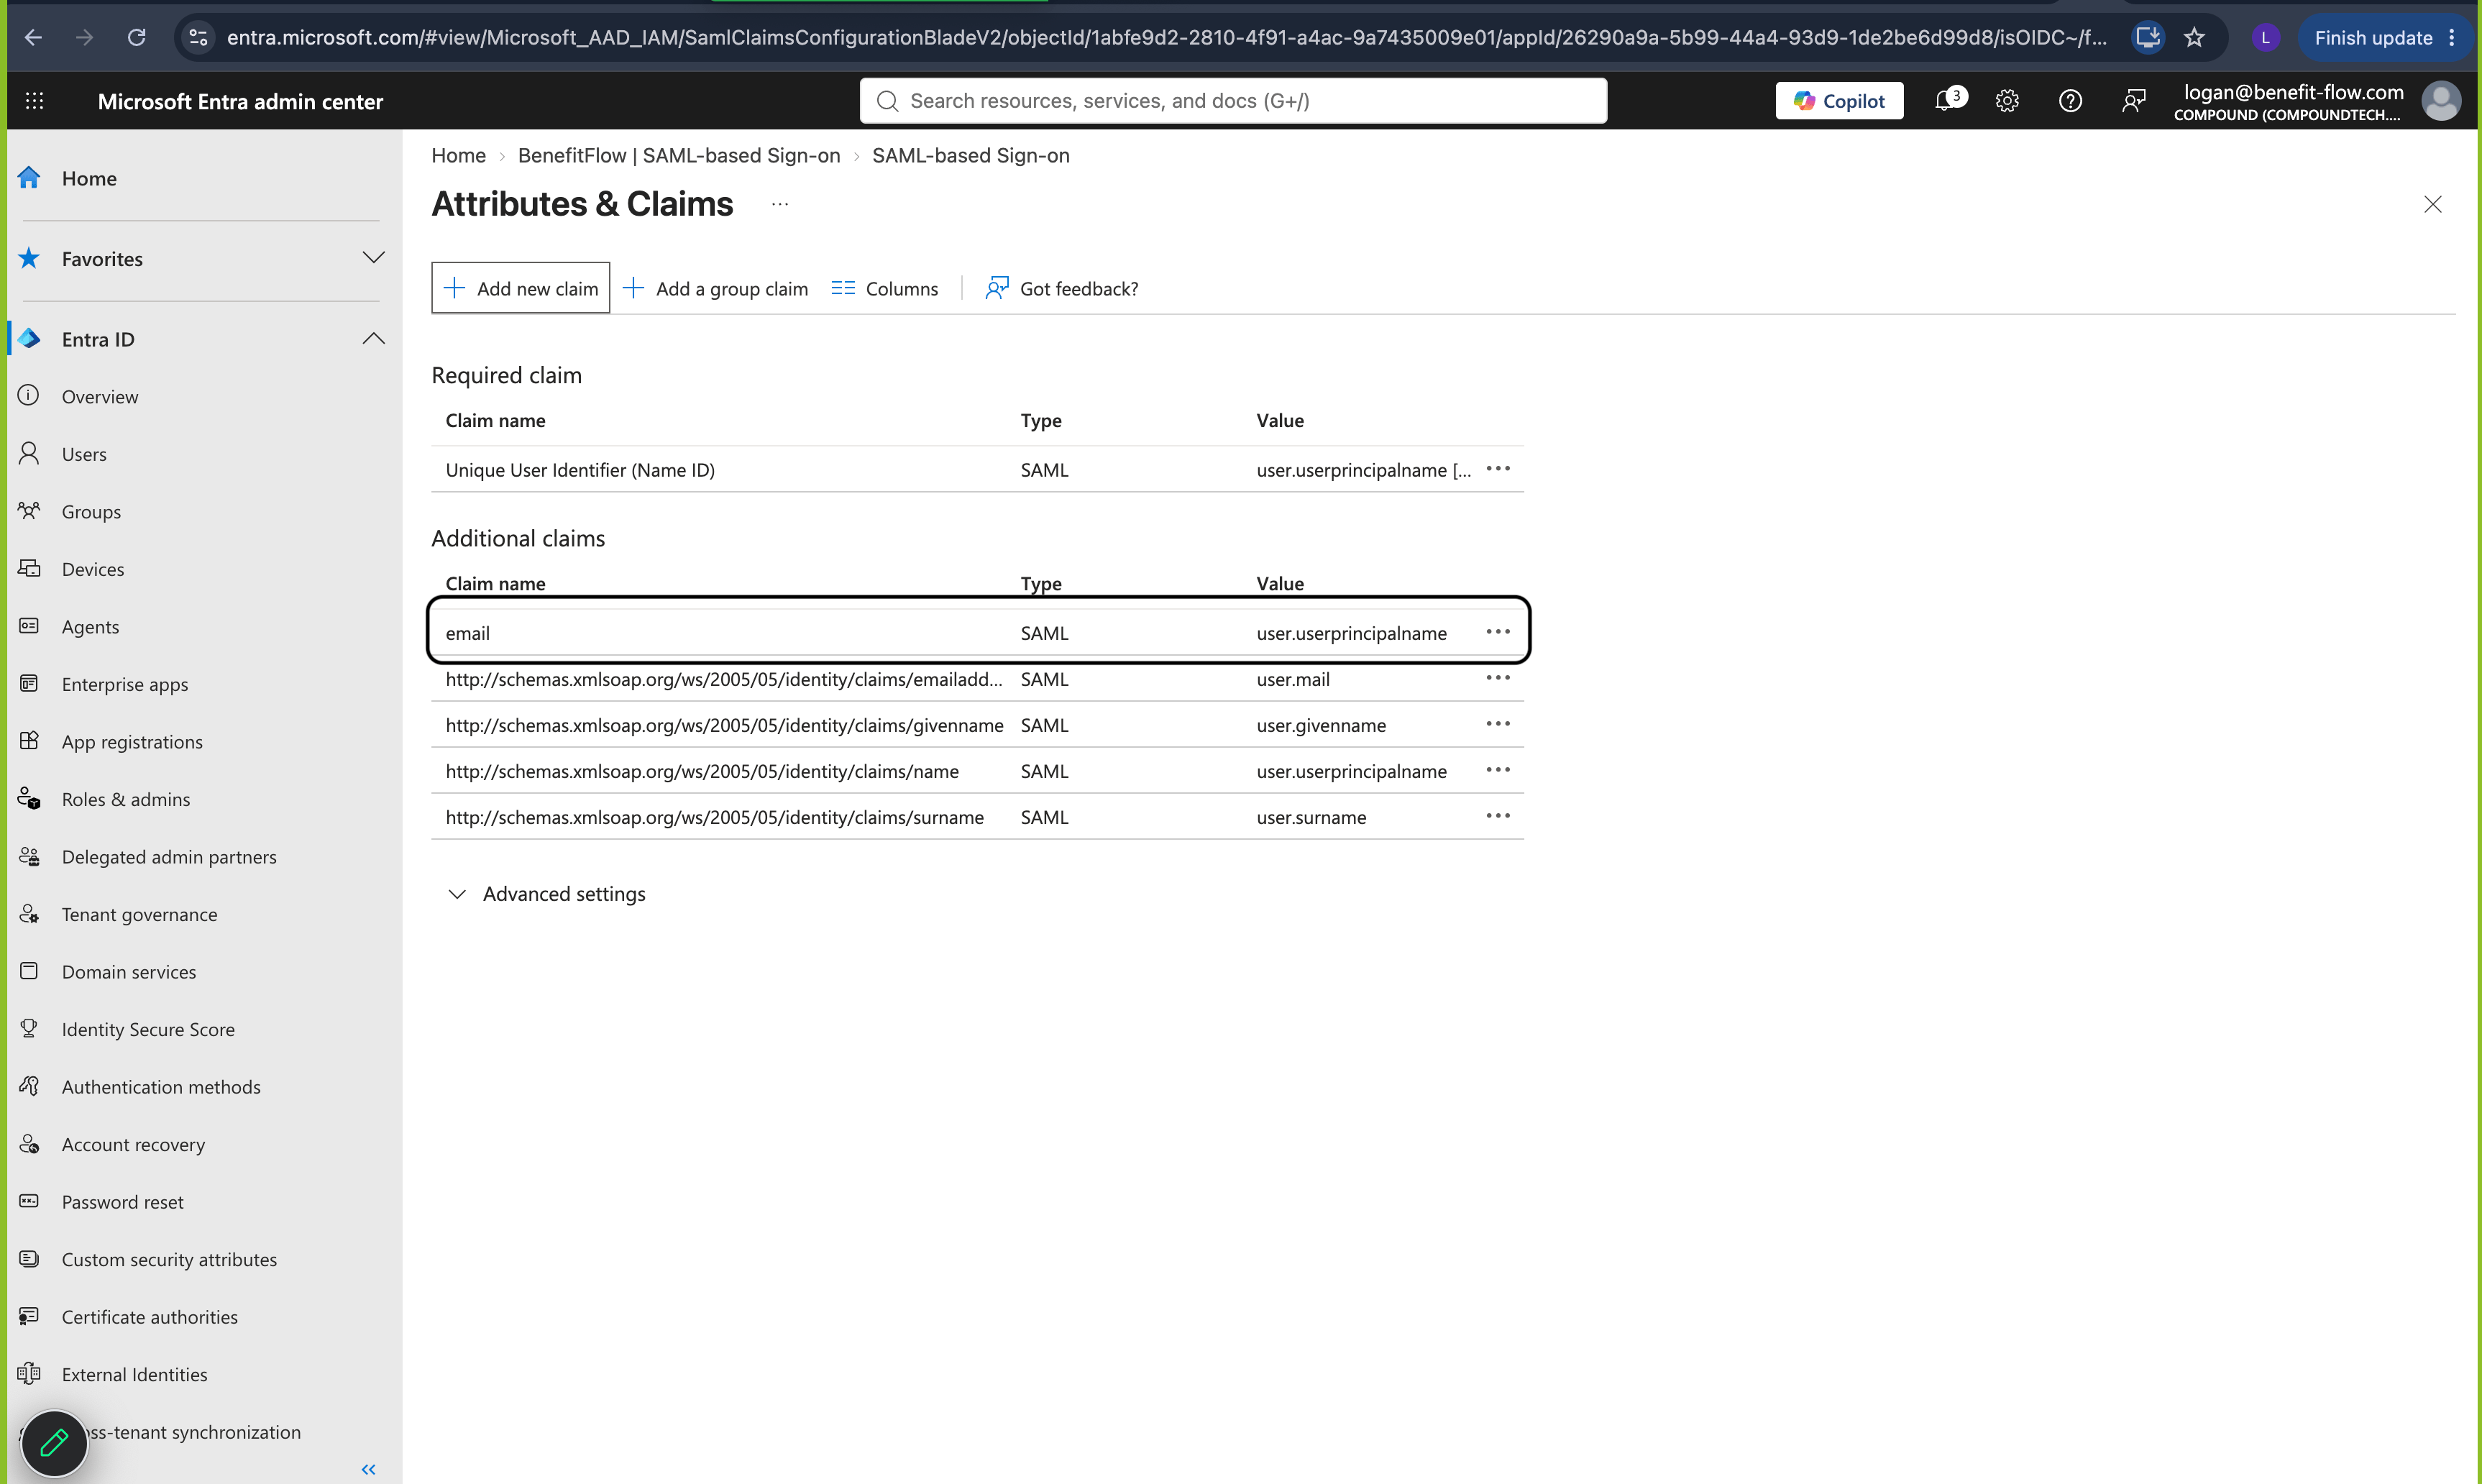
email.Open Attributes & Claims, click Edit, then Add new claim:- Name:
email - Namespace: leave blank
- Source: Attribute
- Source attribute: the attribute that holds each person’s work email, the same address they were invited to BenefitFlow with
user.userprincipalname, because people sign in with their email.
If your people sign in with something else (for example jsmith@corp.example.com while their
email is jane.smith@example.com), pick the attribute that holds the real address, usually
user.mail.To check, open any user in Entra and compare User principal name to Email. If they
match, use user.userprincipalname. If they don’t, use user.mail.Click Save.Which attribute to choose
Which attribute to choose
We match the
email claim to the address each person was invited under, so the claim has to
carry exactly that address.user.userprincipalnameis the name people sign in with. Every Entra account has one, and in most organizations it’s the work email. If it isn’t (sign-in names on a different domain, short usernames,onmicrosoft.comnames, guest accounts), it won’t match and sign-in is refused.user.mailis filled in from Exchange. It’s blank for anyone without a mailbox, such as service accounts and contractors, and a blank value means that person can’t sign in. Nothing in Entra warns you it’s empty.
5
Assign your users
Go to Users and groups and assign the people who should have BenefitFlow access. Only
assigned users can sign in through this application.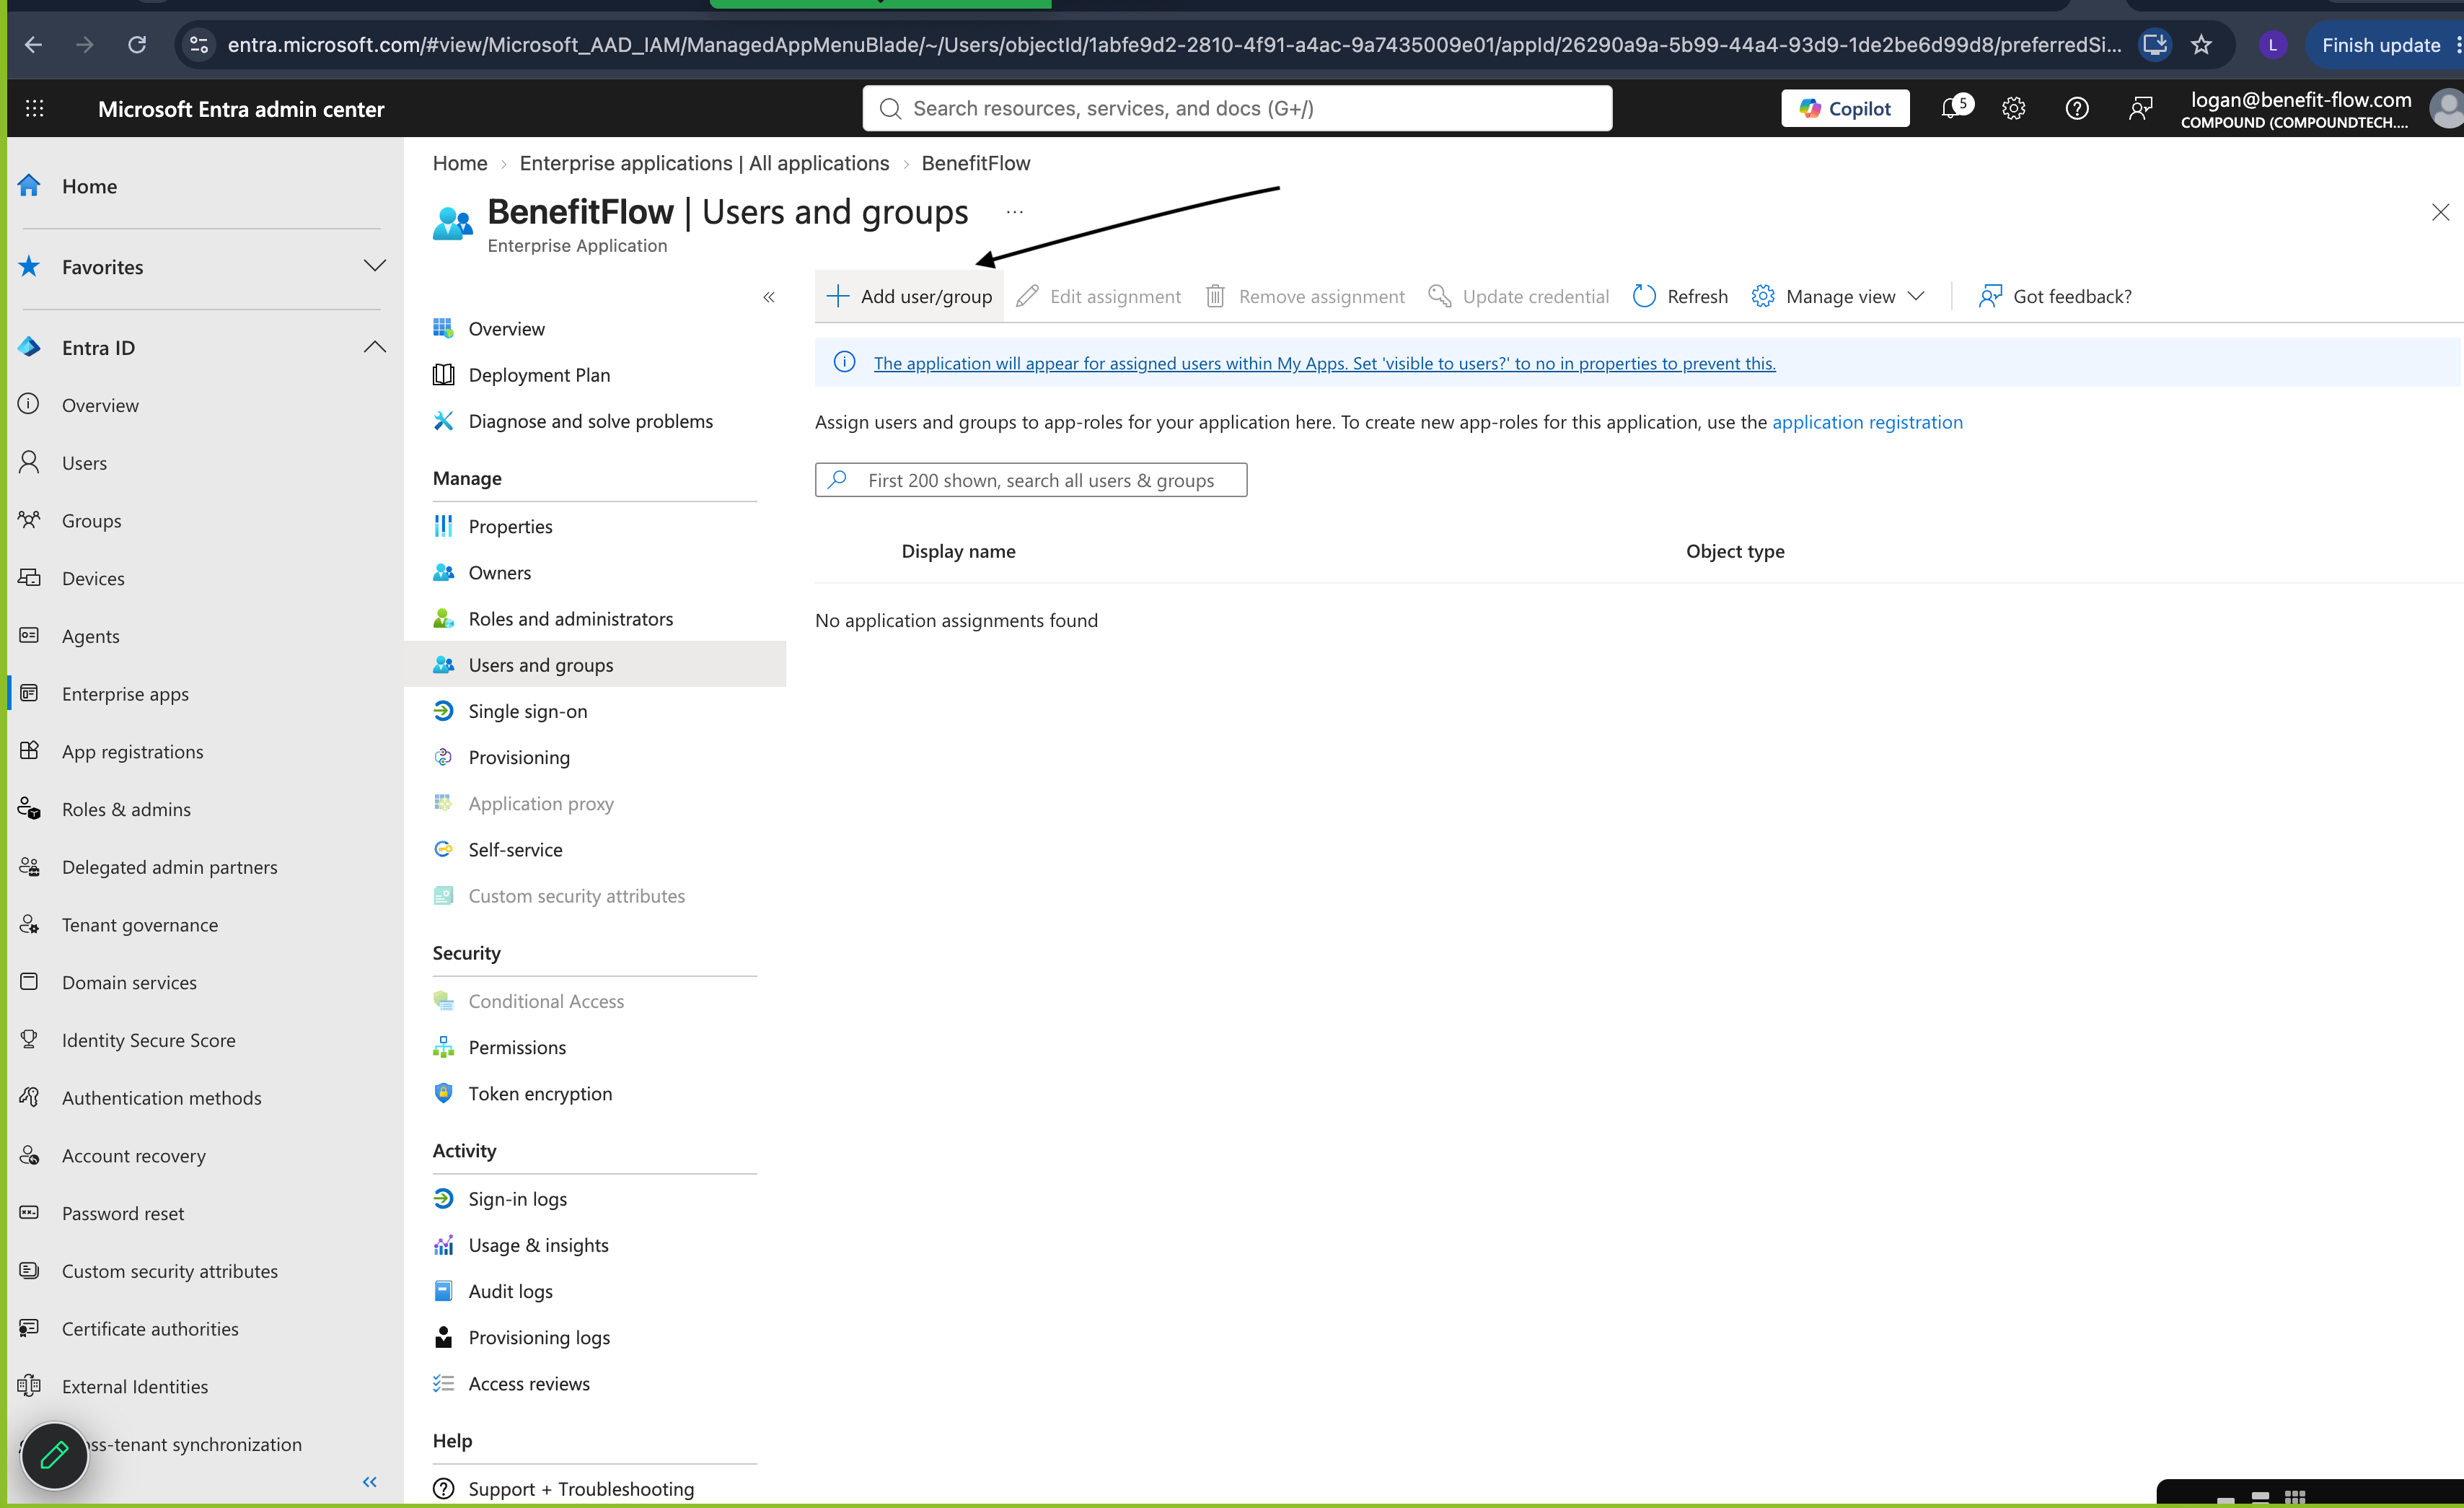
6
Copy the metadata URL
Return to the Single sign-on page. Under SAML Certificates, copy the
App Federation Metadata Url. It’s a link ending in 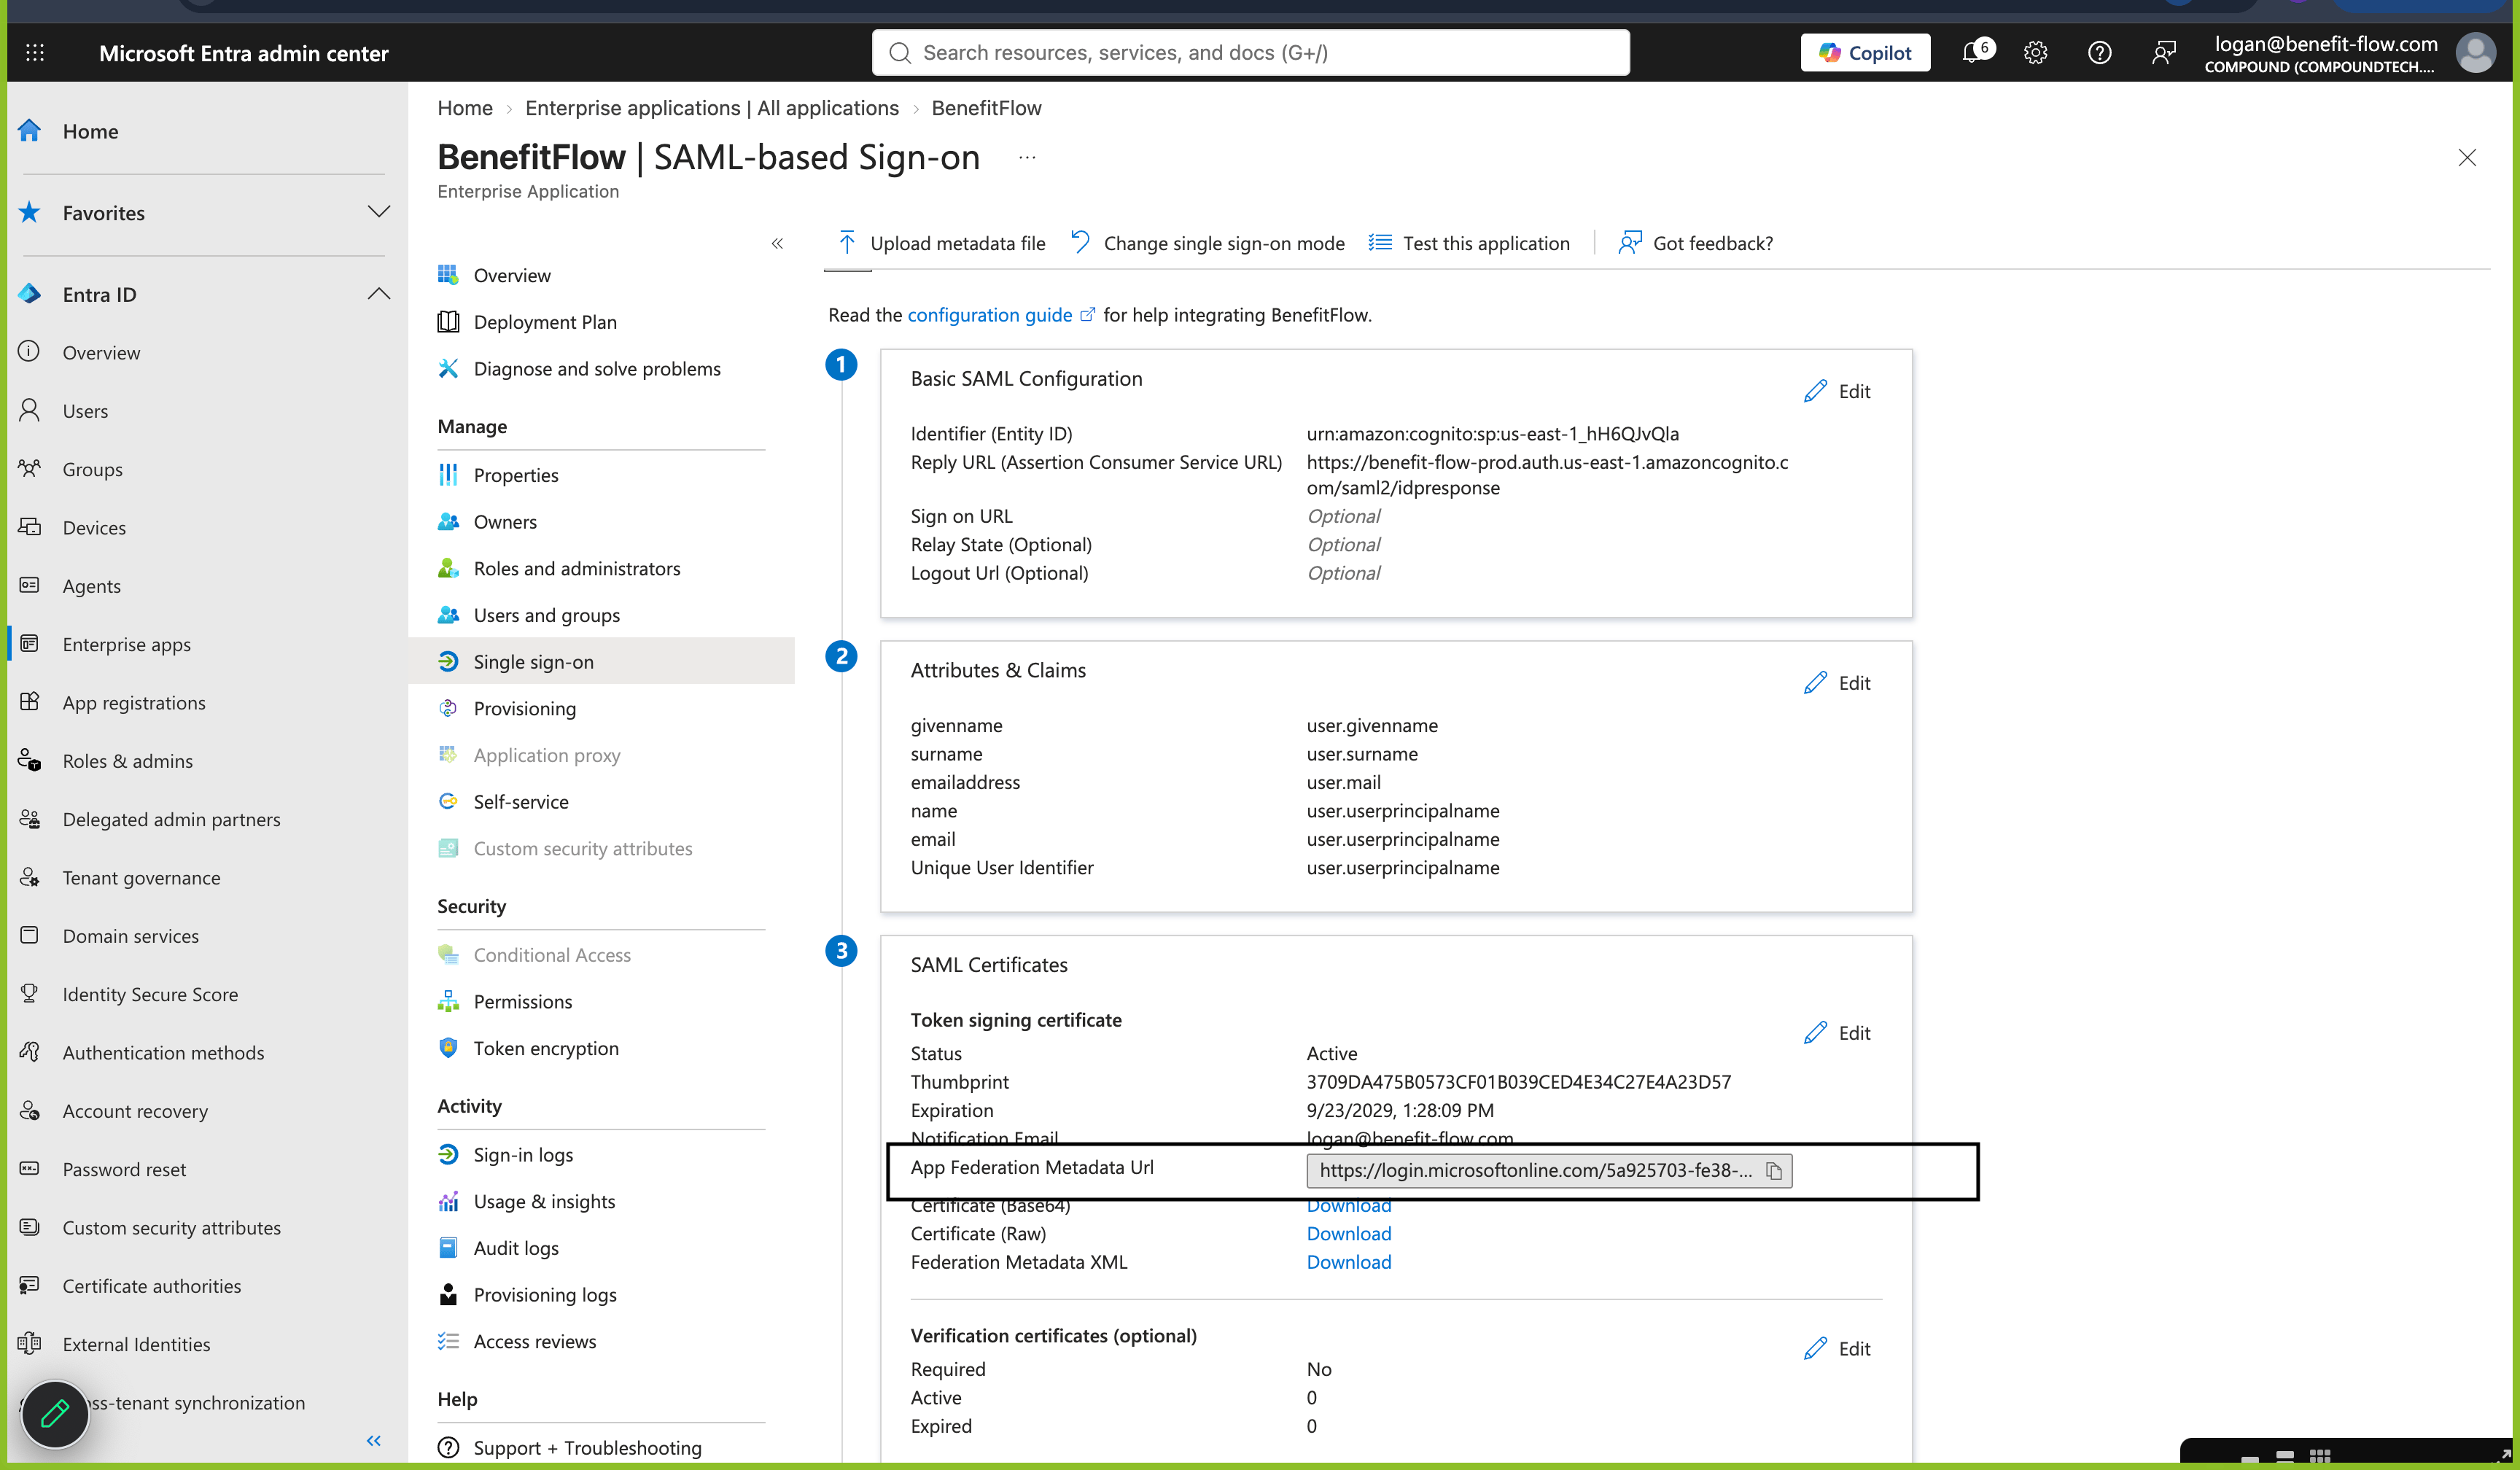
.xml.7
Send us two things
Email these to your BenefitFlow contact:
- The metadata URL from Step 6.
- The email domain or domains your employees use (for example,
yourcompany.com). Include every domain in use if there’s more than one.
If sign-in doesn’t work
Someone signs in to Entra, then BenefitFlow says they have no account
Someone signs in to Entra, then BenefitFlow says they have no account
This is the common one, and it’s almost never what it looks like. The sign-in worked. The email
address Entra sent didn’t match any BenefitFlow account. Two things to check:
- Did you complete Step 4? Without the
emailclaim, we receive no address at all. - Is the address the
emailclaim sends the same one that person was invited under? Someone invited asjane@yourcompany.comwho signs in to Entra asjane.smith@yourcompany.comwon’t match.