

First time? Your CRM has to be connected before anyone can sync. That’s a one-time setup an admin does — see Connecting Your CRM (Admin Setup). Already connected? Keep going.
Step 1: Add records to a list
1
Search and filter
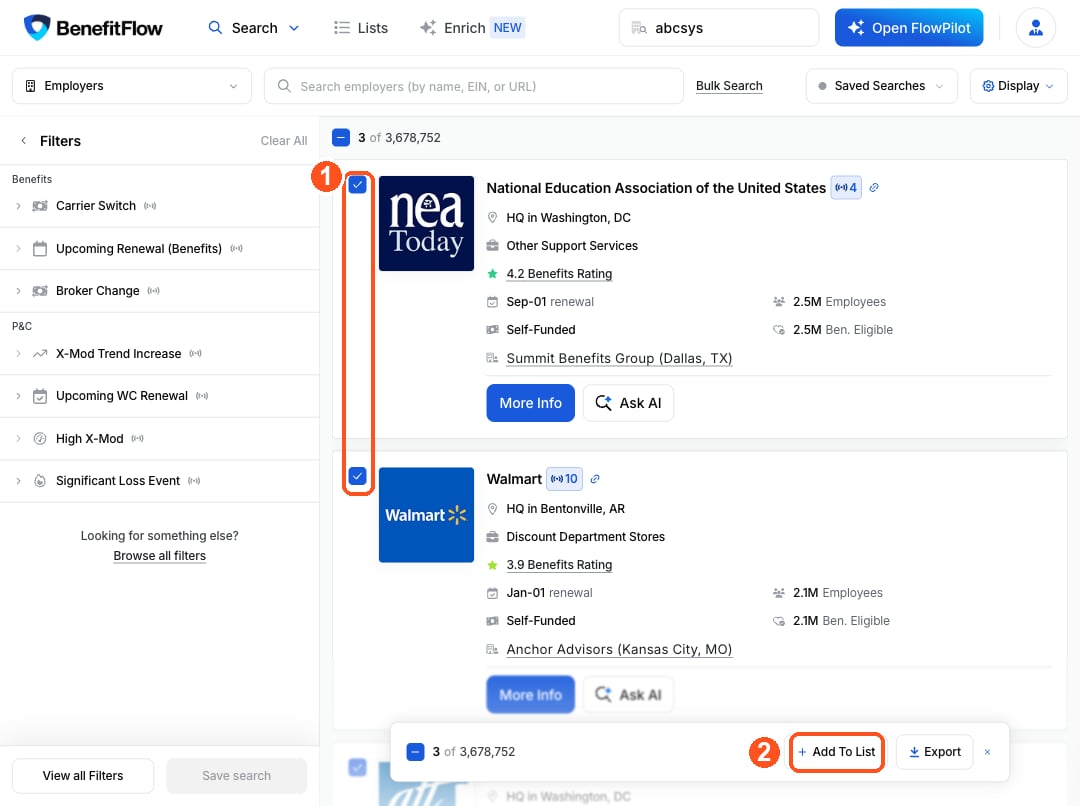
Run a search on any tab (Brokers, Contacts, or Employers) and apply your filters. On the Employers, Broker Contacts, and Employer Contacts searches, you can also use the CRM Filter to focus on records that aren’t already in your CRM.
2
Select records
Use the checkbox on each row, or click Select All.
3
Add to a list
Click Add to List, then choose an existing list or create a new one.
Step 2: Open the list
Go to the Lists tab and open the list you just built.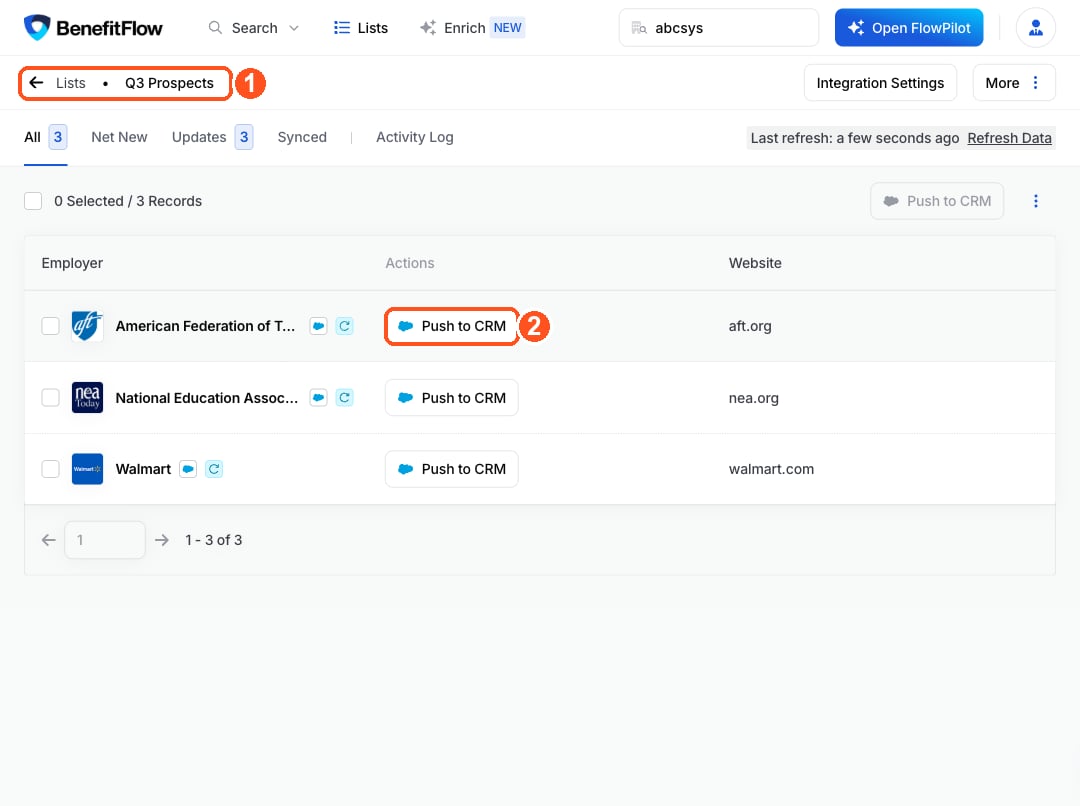
Step 3: Sync to CRM
From inside the list, click Push to CRM on any record to sync it, or select records and use the Push to CRM button up top to sync in bulk.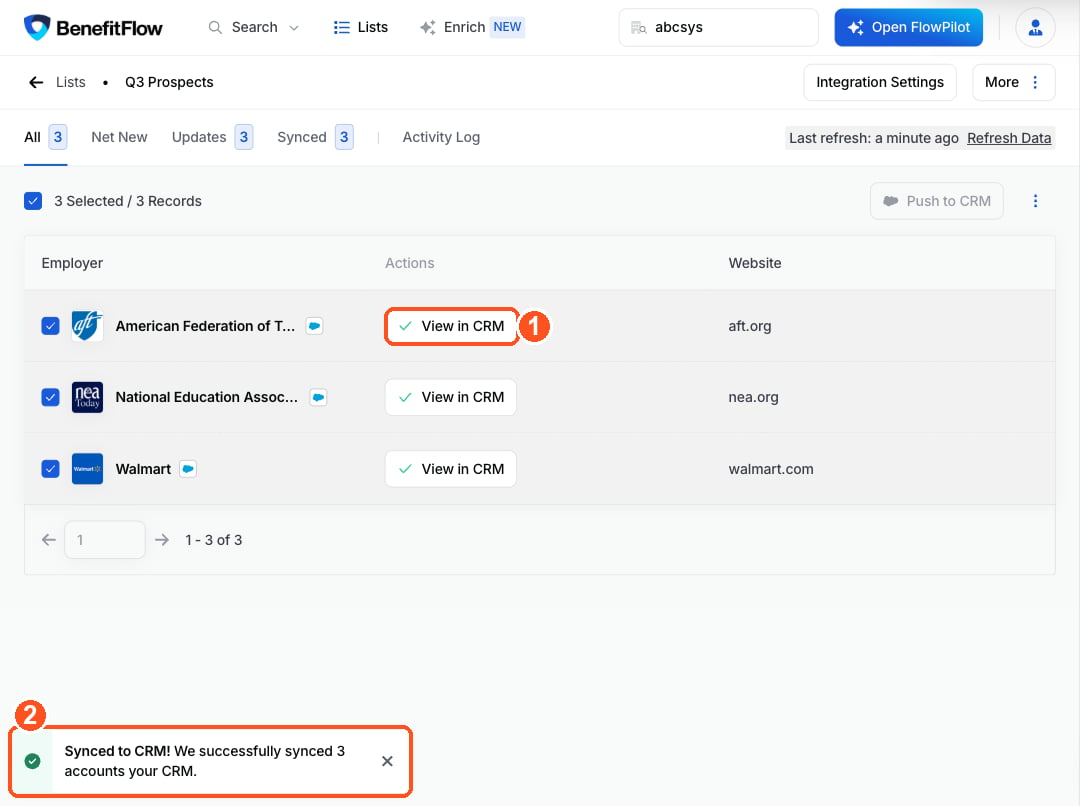
- ✅ Net-New — the record doesn’t exist in your CRM yet, so it gets added
- 🔁 Update — the record already exists; only approved mapped fields are updated
- ✔️ Synced — the record exists and no changes are needed
- Assign Owner — manually reassign CRM record ownership
- Export — send records to CSV instead of (or alongside) a CRM sync
How matching works
BenefitFlow prevents duplicates by matching on these unique identifiers:BenefitFlow retains historical email addresses, so it can still match a contact even if your CRM has a stale email on file.
Good to know
- The broker → office → contact hierarchy is built automatically on every sync. You don’t need to create it. (See Association Architecture.)
- Employers sync as standalone accounts and are not automatically linked to their primary broker office. That association has to be added manually. See Linking Employers to Their Primary Broker Office.
- Field mappings are set by your admin. If a field isn’t syncing the way you expect, check with them. (Admins: see Connecting Your CRM.)